Tuesday, June 22, 2021

Southwest Black Bean Salad

This salad!!  I started making this back in the late 90’s, even before I found my niche with cooking. It’s so versatile. Over the years I’ve used it as a salad dressing, atop a bed of chopped green leaf or butter lettuce, I’ve put it on warm rice, scooped it with chips, added chicken and pasta….the possibilities are truly endless. 


Southwestern Black Bean Salad

Ingredients

Dressing

  • 2 tablespoons olive oil
  • 1 teaspoon paprika
  • 1 teaspoon cumin
  • 1/4 teaspoon cayenne pepper
  • 2 tablespoons lime juice freshly squeezed
  • 1/2 teaspoon salt

Salad

  • 30 ounces black beans cans
  • 1 1/2 cups corn kernels
  • 1 small red bell pepper stemmed, seeded and diced 
  • 1 small green bell pepper stemmed, seeded and diced
  • 1/2 cup tomatoes chopped
  • 1/4 cup cilantro chopped or flat-leaf (Italian) parsley
  • 1/4 cup red onion chopped
  • 1/2 cup cubed cheese
  • 4 stalks of Celery, diced 

Instructions

  1. In a large bowl, combine all of the dressing ingredients. 
  2. Whisk until combined. Then add the  salad ingredients. 
  3. Toss to coat. 
  4. Enjoy!

Sunday, June 13, 2021

Manicotti vs. Cannelloni, a family divided

Manicotti vs Cannelloni


My family (please note we are not at all Italian!!) have been making Manicotti for decades.  As long as I can remember this dish has been HIGHLY requested.  Several years ago, my cousin gathered all of our family recipes, and there was some heated debate of who actually “owned” our family favorite dish.  Turns out we all decided my Aunt Jean was the true originator (adapter).  


No please don’t get me wrong, while our “manicotti” is a family favorite version, I learned years later that the actual dish we made was cannelloni, or a version there of.  We used 4 cheeses, cottage, cheddar, mozzarella and that green can of “sawdust”, err I mean parm….. at some point and time someone added little smokes into the tubes.  Don’t ask, I don’t know.


Fast forward quite a few years, and a friend invited us over for dinner.  She was making tons of manicotti.  We discussed the above mentioned family version.  In the end I learned our version was completely backwards.  But we still call it manicotti. 


Here is our favorite Manicotti to make. In the pictures I has making it to give away (I don’t normally don’t bake in tin foil!) but I do make extra filling and stuff all the tubes.  Then tuck a tray or two into a freezer bag and freeze them for a later dinner.  We always have left of spaghetti sauce (Goon’s Spaghetti), so this is a quick and VERY easy dish to pop together when your feeling time poor.


Manicotti 

  • 1 package of Manicotti tube pasta
  • 16 oz ricotta
  • 8 oz grated parm
  • 1/4 Parsley, chopped loosely packed
  • Salt and pepper to taste
  • 1 egg, beaten 
  • 3- 4 cups Left over spaghetti sauce, or your favorite jar
  • 12-16oz Shredded Mozzarella
  • 1 Pastry bag

Instructions

  1. Par cook the pasta.  You want to not fully cook, as they will fall apart.
  2. Set of parchment to cool
  3. Mix together the ricotta, parm parsley and egg.  Lightly salt (the cheese may have enough salt).  Add pepper to your liking.
  4. Put the filling mixture into the pastry bag, cut off a small/medium hole in the tip.  you can also use a ziplock bag, and cut off one corner.
  5. Take the bag and pipe the filling into the tube.
    1. If you don’t have a piping bag, you can use a spoon to stuff the tube
  6. (At this point you can place the back into the plastic contained the uncooked past came in, and slide into a large ziplock, to freeze)
  7. Layer about 1/2 cup in the bottom of a prepared baking dish.
  8. Place the stuffed tubes in a baking pan.
  9. Continue until the pan is full.
  10. Place the remainder of your pasta sauce on top of the pasta.
  11. Top with shredded mozzarella
  12. Bake at 350°, for 20-35 minutes, or until golden and bubble.


Here are the family versions…..


Tuesday, June 8, 2021

Chicken Bahn Mi Burgers

On our recent trip to Hawaii, we were very fortunate to stay with some good friends in their Kona home. Ok to be honest we stayed mainly on their lenai and in the pool, but we actually had a room. 


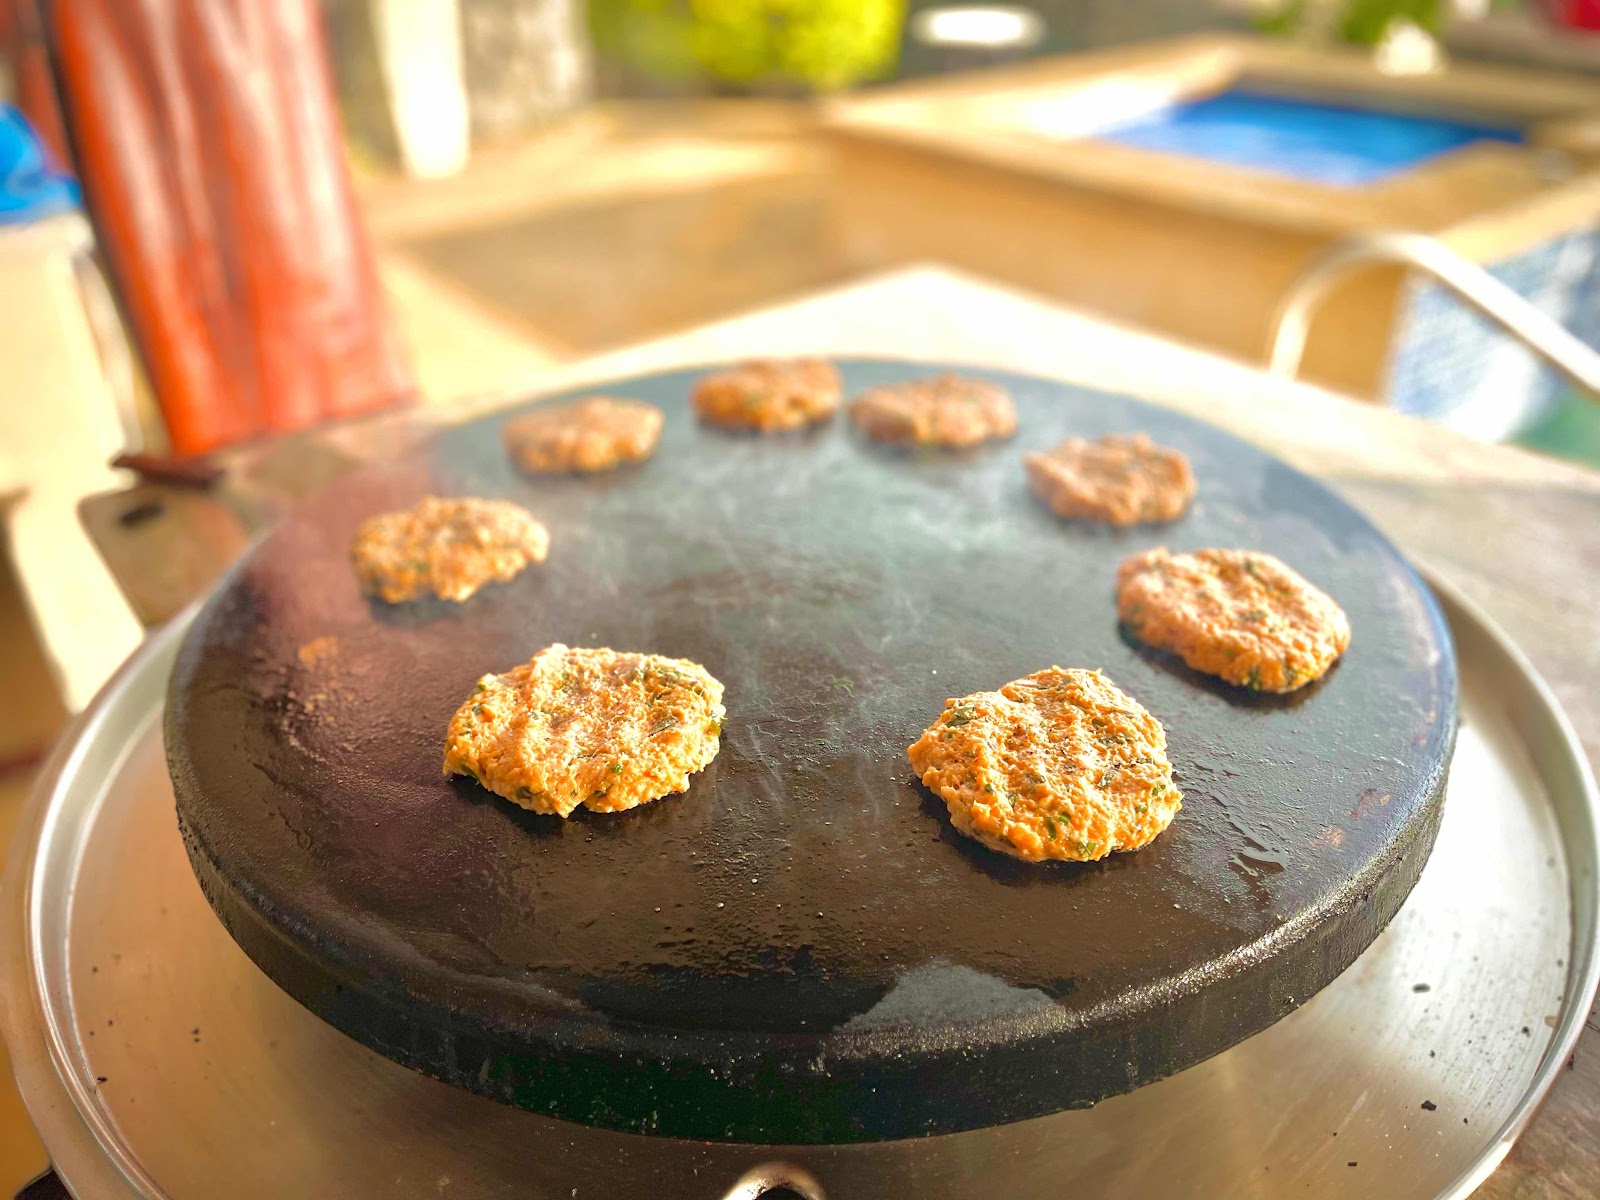
Not only did they have an amazing kitchen, the also had an outdoor flat top range. I think we cooked every dinner out there. We had a great time. 


This night was the last evening another set of good friend were spending with us. They are some great food adventurists as well. (When Phil and I get together, it’s all about great food). So we decided to make Bahn Mi Burgers. 


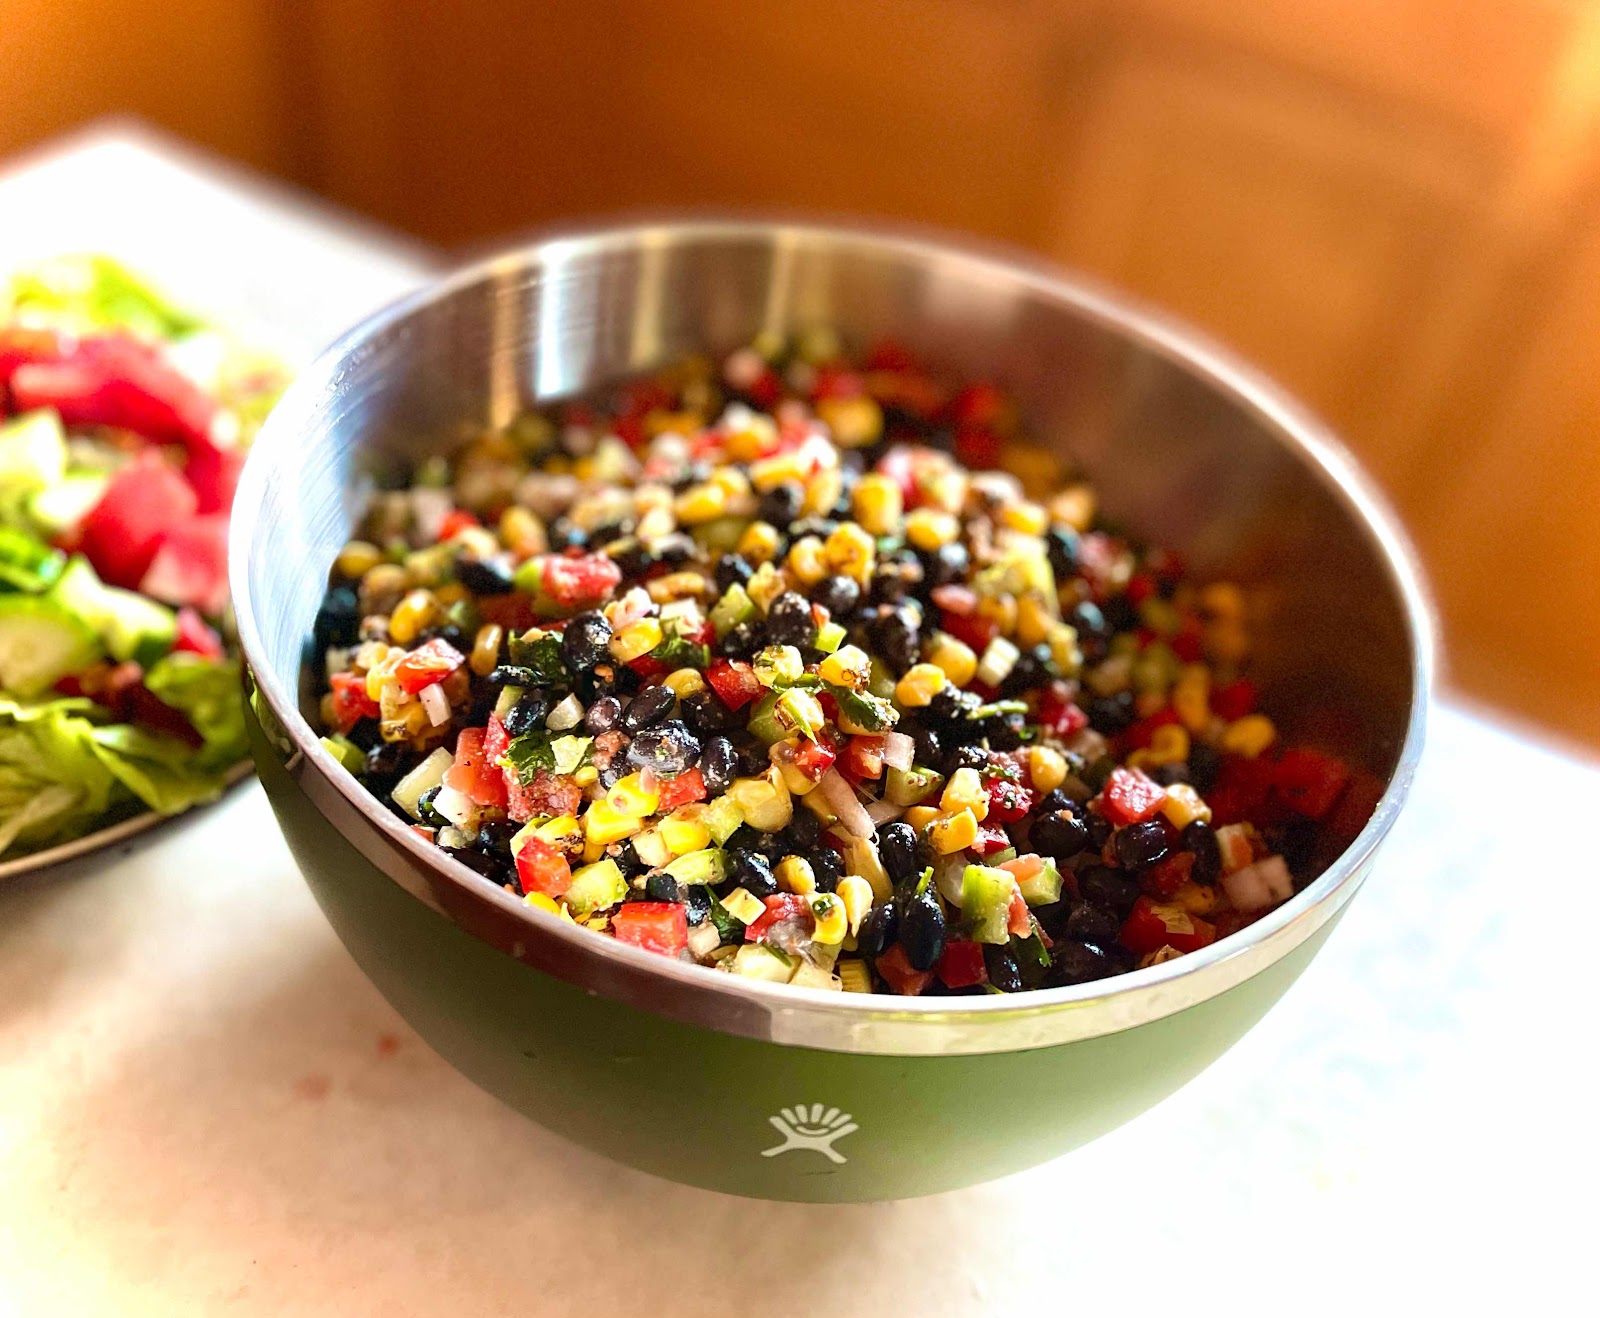
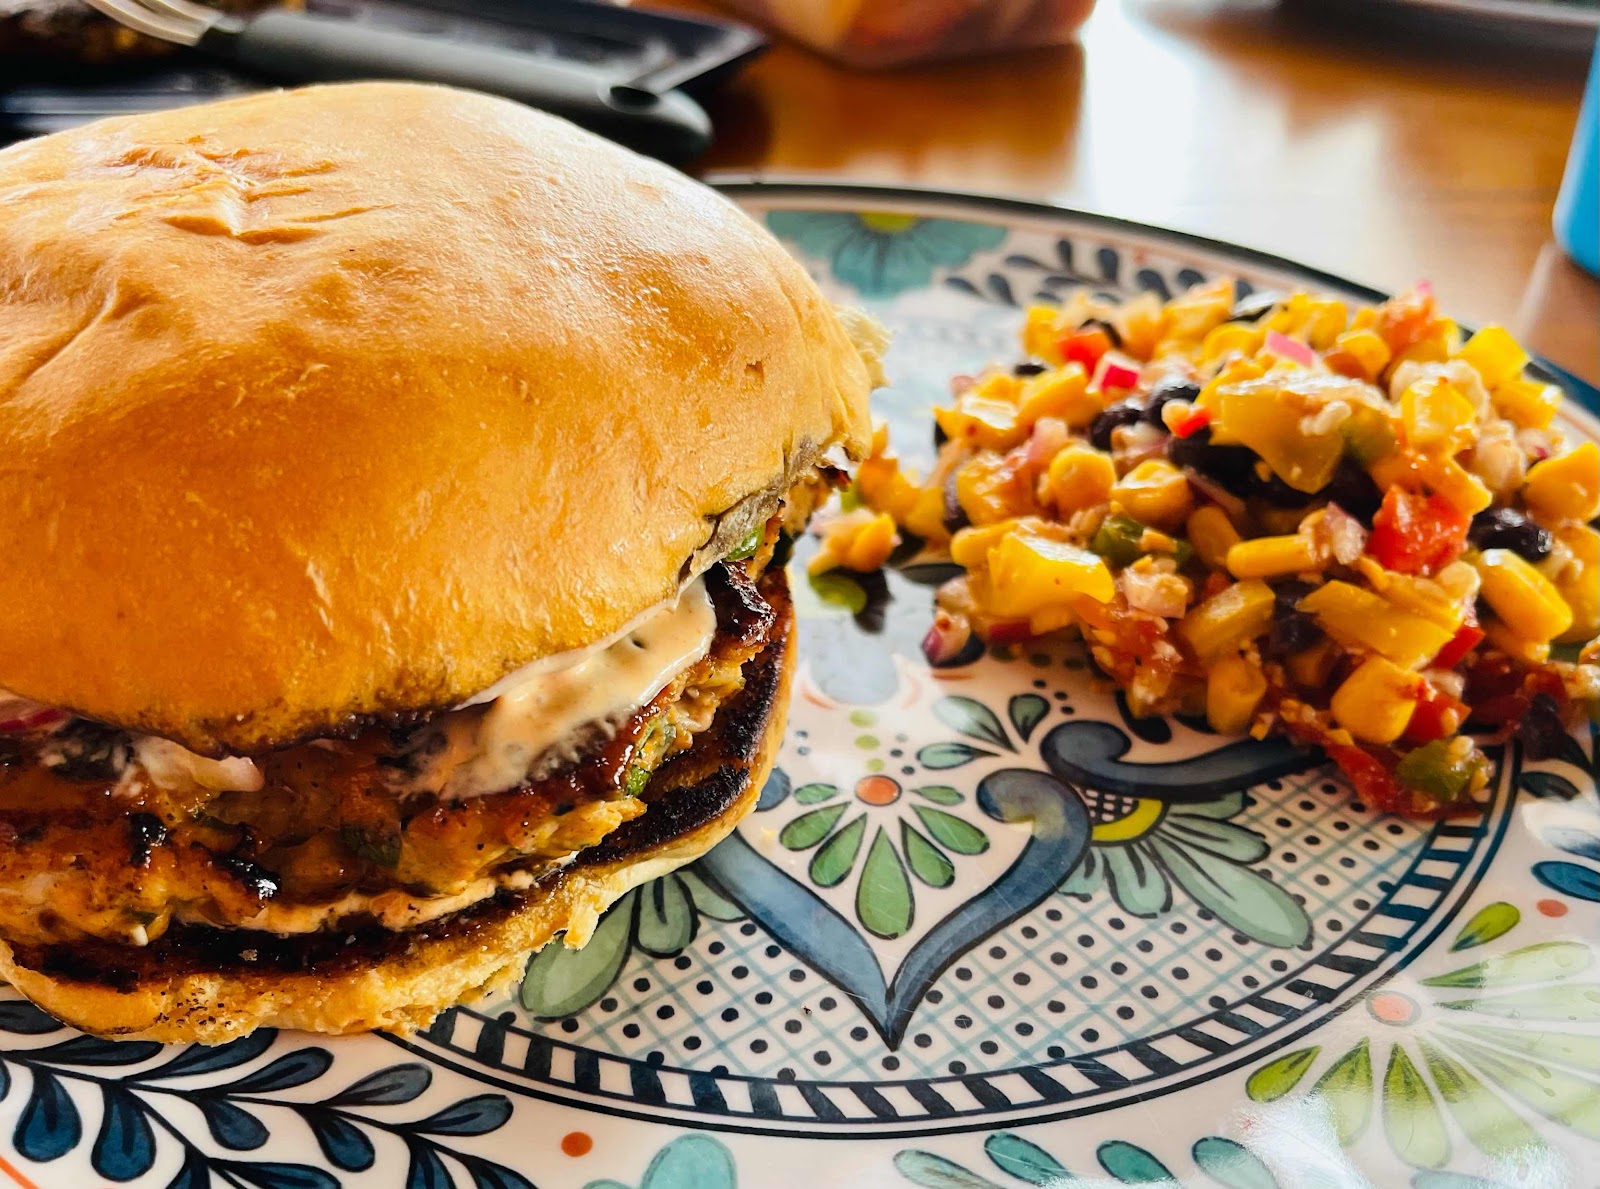
These flavorful and spicy patties were just the thing to make you sweat after a day of sitting around in 82° weather. I served the Bahn Mi Burgers with some spicy pickled vegetables on locally made egg buns we found at the farmers market, sriracha crema and a SW corn and pepper salad. This ones definitely on repeat. (By the way, the original recipe called for ground pork, but because we had several chicken only eaters, I opted to switch the pork with chicken. You couldn’t even tell a difference!!)


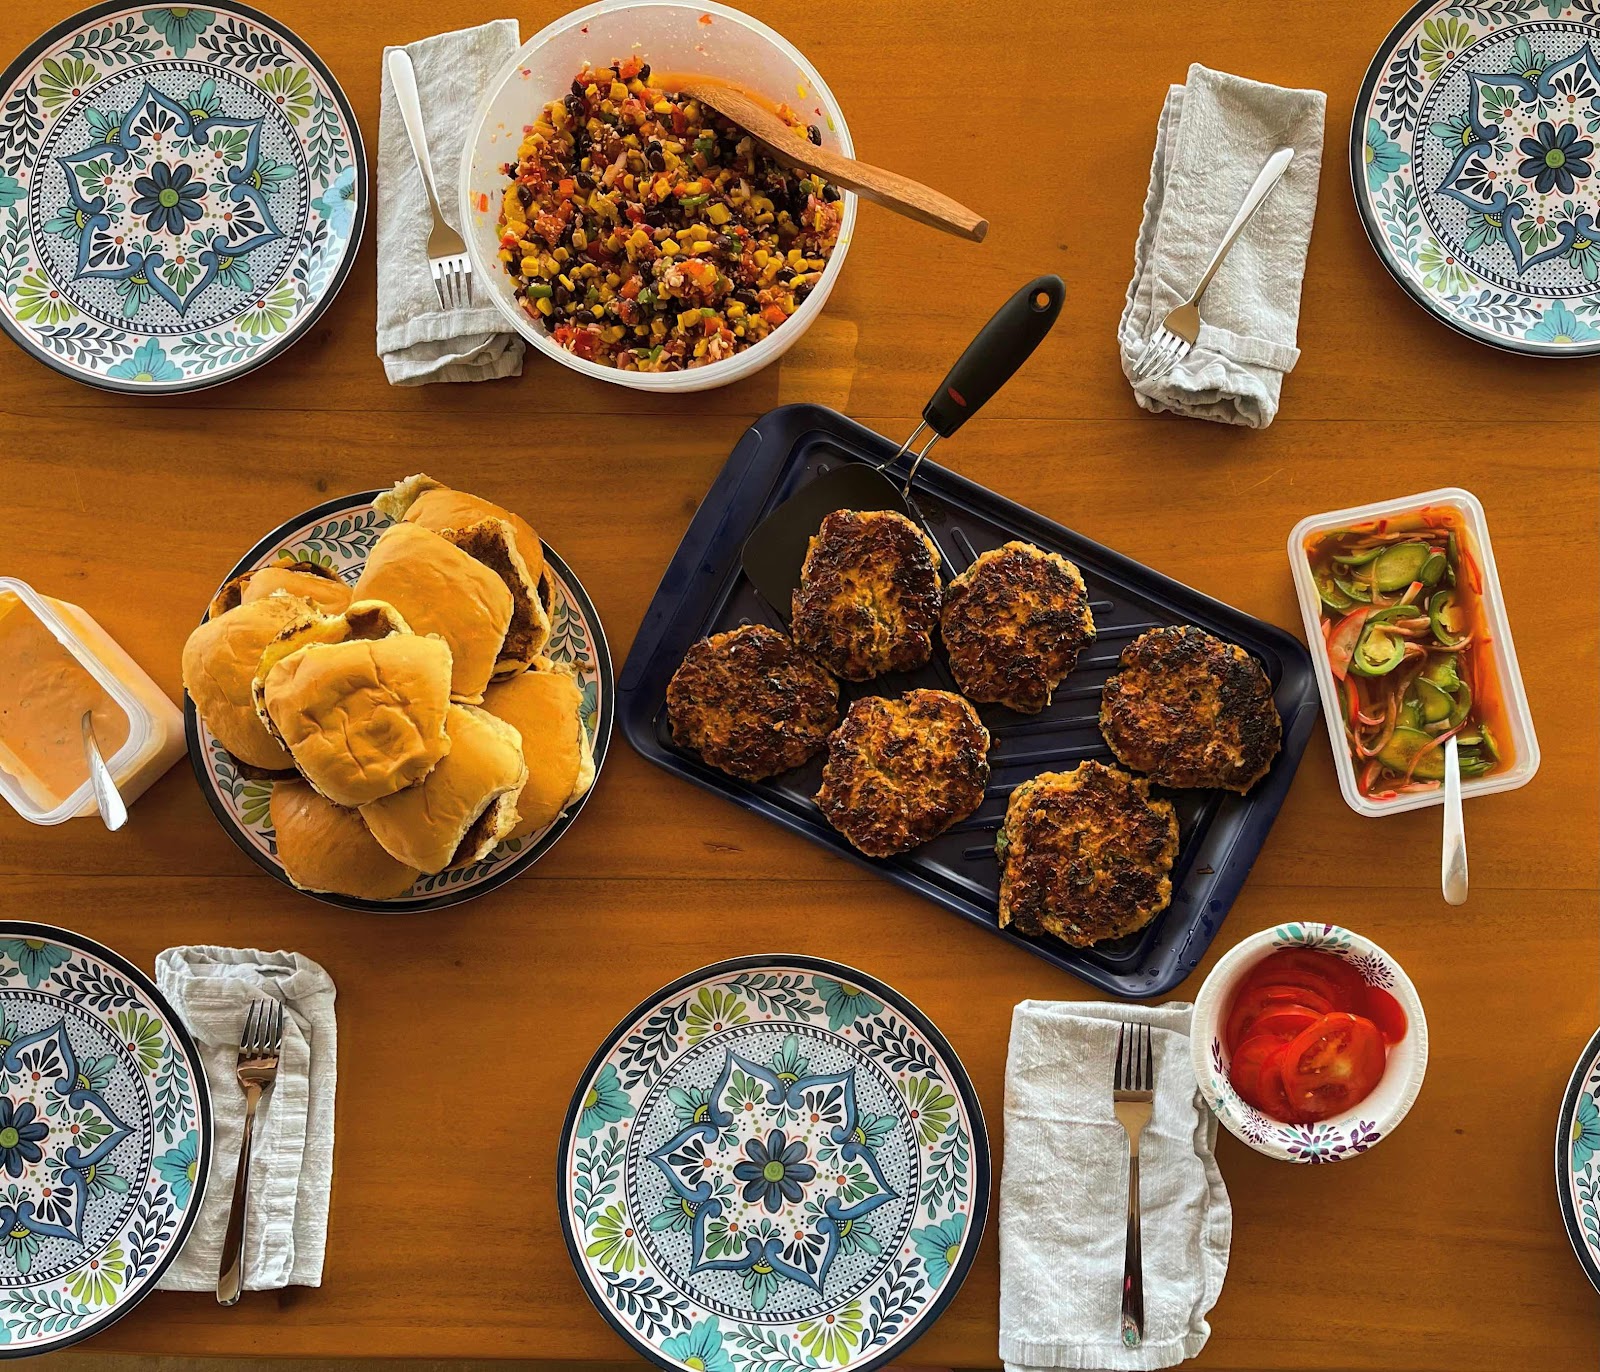
Chicken Banh Mi Burger

Ingredients

Burgers Patty

  • 1 lb Ground chicken
  • 1/4 cup Finely chopped fresh basil
  • 4 Garlic cloves, minced
  • 3 Green onions, finely chopped
  • 1 tbsp Fish sauce
  • 1 tbsp Sriracha
  • 1 tbsp Sugar
  • 2 tsp Cornstarch
  • 1 tsp Freshly ground black pepper
  • 1 tsp Kosher salt

Sriracha Mayo

  • 1 cup Mayonnaise
  • 3 Green onions, finely chopped
  • 2 tbsp Sriracha
  • 4 Brioche buns
  • Sesame oil
  • Sriracha mayo
  • Favorite Vietnamese pickled veggies (recipe below)
  • Cilantro
  • Cucumbers
  • Jalapeños (optional)

Method

  1. In a large bowl combine all ingredients for patties until fully combine and separate into 4 equal parts. Using your hands, carefully form each patty until even in thickness all the way around is achieved and set aside. You want it about ⅓” thick. (Chill in fridge, until ready to grill)
  2. In a small bowl combine ingredients for sriracha mayo and whisk until smooth. Can be made ahead and stored for up to a week.
  3. Preheat grill to medium/high heat. Add patties to the grill and allow to cook without moving for 5 minutes. Flip the patties and repeat with the other side. If the meat isn't cooked through, flip every few minutes until cooked to avoid burning. If you don't have a grill heat a large cast iron skillet over medium/high heat and coat lightly with sesame oil. Insert a cooking thermometer to ensure you have cooked to an internal temperature of 165°.
  4. To prepare the burgers toast the brioche buns On the grill. Add sriracha mayo to both sides of the bun and top with the patty, cucumbers, jalapeños, cilantro and plenty of pickled vegetables. Serve immediately.

To make pickled vegetables:

Quick Pickled Vegetables 

  • 1 cup rice wine vinegar
  • 2 Tbsp fish sauce
  • 2 Tbsp soy sauce 
  • 2 Tbsp Sambal Oleck 
  • 1 Tbsp sugar 
  • 1 cucumber, thinly sliced
  • 1-2 radishes, thinly sliced
  • 1/4 lb Dikon radish, thinly sliced
  • 1 carrot, jullianed 
  • 4 thinly sliced red onion 
  • 1 large jalapeño, thinly sliced

Directions 

  1. Mix together first 5 ingredients. 
  2. Prepare all the vegetables and place in pickling brine. 
  3. Seal container, shake and place in refrigerator for 30 minutes to an hour. 
RECIPE NOTES: 
As with any of my recipes, you can trade up or switch out and ingredients. 
* We ran out of cilantro, but had plenty of Thai basil so we used that. 
* We had left over cilantro crema from Ono tacos the night before, so I added sriracha and made it the “Sriracha Mayo”
* We had a couple of non pork eaters, so I switched out to chicken
* We ran out of carrots, so I just added more cucumber. 


Saturday, June 5, 2021

Roasted Vegetables and Artichoke "Hummus"

We had a very good friend of our come down for a visit. He and her husband were following a very strict AIP diet. I want sure what exactly that was so after a little research I found that they could have nightshades (peppers, potatoes, tomatoes or eggplant) also no beans or dairy. Well, I’m alway up for a challenge so while I was reading up on unfamiliar(to me) diet, I started jotting down a few ideas. I came up with this great take on a bean and nightshade free “hummus”. 


Roasted Vegetables and Artichoke "Hummus"

ingredients

  • 1 - 12 ounce jar whole or quartered artichoke hearts, about 1.5 cups (not marinated)
  • 3 medium carrots, peeled and chopped into 1/2 inch pieces, about 1.5 cups
  • 1 small butternut squash, peeled, seeded and cubed. 
  • 1/4 cup olive oil, divided
  • 2 cloves garlic
  • 1/2 teaspoon ground turmeric, to taste
  • Juice of 1 lemon, about 2 tablespoons
  • 1 teaspoon of zest, optional
  • 1/4 to 1/2 teaspoon sea salt, or to taste
  • 1 cup full fat coconut milk,

instructions

  1. Refrigerate the coconut milk upside-down for at least 30 minutes. Open and gently drain off the time liquid. Reserving the thick paste. Set aside. 
  2. Preheat oven to 400 degrees. Place chopped carrots and butternut cubes on parchment-lined sheet pan and drizzle with olive oil. Add garlic. Roast for about 10 minutes until very tender and starting to get a little color.
  3. While veggies are cooking, rinse and drain the artichokes, pressing to get out any extra liquid, and place them in the food processor. Add turmeric, lemon and salt.
  4. Add carrots to processor and run until fairly smooth, about 1 minute, scraping sides as necessary. Add coconut solids and process. 
  5. Once things are looking well blended, slowly drizzle 3 tablespoons olive oil into the mixture while the machine is running. This helps to emulsify the oil into the hummus, making it extra creamy. Process for an additional 1-2 minutes until super smooth.
  6. Let cool and enjoy with sliced veggies, or in wraps or bowls. When serving as a dip, drizzle with a little olive oil and a pinch of chopped parsley or cilantro if you have it on hand.

Thursday, June 3, 2021

Spring Vegetable Pasta Carbonara

After a cold winter, we all look forward to what Spring and Summer bring.  As a blogger, about mid February I get the itch to start planting summer crops, but in our climate, that’s a little early.  So I settle for some grocery store finds.  I was inspired to make this dish by all the colors and fresh flavors.  It is something that not only can be made in Spring, but all Summer as well.


Spring Vegetable Pasta Carbonara

INGREDIENTS

  • 4 ounces pancetta cut into a small dice (I omitted)
  • Olive oil
  • 10 ounces pasta fettuccine or linguine (I used penne)
  • 1 lb fresh English peas (frozen as ok as well!)
  • 1/2 zucchini, cut into half moons
  • 1 carrot, julienned (I use pre cut)
  • 1/2 lb green beans, cut into 1 inch lengths
  • 8 oz mushrooms, quartered
  • 3 scallions thinly sliced on an angle
  • 1 egg whisked
  • ½ cup freshly grated parmesan
  • ½ cup freshly grated pecorino romano
  • 1 lemon zested and juiced
  • Fresh basil for serving

INSTRUCTIONS

  1. Bring a large pot of water to a boil.
  2. Cook the pasta according to the package directions until al dente. If using fresh peas, add the peas, carrots and green beans about 2 minutes before the pasta is done. (If using frozen, add 30 seconds before the pasta is done). Reserve 1 cup of the pasta cooking water before draining the pasta and the peas.
  3. In a large heavy bottom dutch oven skillet, add 2 tablespoons of olive oil over medium high heat. Add the pancetta and cook until browned, about 8-10 minutes. Season with pepper and remove from skillet.  Use the drippings to quickly sauté the mushrooms and zucchini, remove from skillet and add back in the pancetta to skillet, turn off heat.
  4. Add a few tablespoons of the pasta water to the skillet with the oil and the pancetta and whisk to combine and emulsify the fat with the water. Add the whisked egg to the skillet making sure not to scramble it. Add the pasta, vegetables and scallions into the pancetta and egg mixture. Toss to combine. Add the cheeses and toss to combine again. Add more pasta water as needed to thin. Season with salt, pepper, lemon zest and lemon juice. Serve with plenty of fresh basil on top. 

(Small florets of broccoli can be added along with the peas, if you’d like)