Showing posts with label Main Dish. Show all posts

Saturday, October 25, 2014

Lasagna Stuffed Spaghetti Squash

I have been a little quiet over the past few months, but know this….I have been cooking.  A few duds, and a few repeats, but nothing blog worthy. (and work has been kicking my butt!!)

Until tonight.  Tonight I decided to make Spaghetti Squash Lasagna. While I came across this in a mindless night on Pinterest…I would love to give credit where credit is due, but I mashed up so many recipes, I’m not sure who to give credit to, so I guess I’ll take it!!

With most dishes, I run the risk of my reviewers….well, ok, my husband.  I usually get an “it’s good”, or “eeeh….you don’t need to make this again.”  Tonight’s dish was a “wow, this is really good”.  So you know that you should try making this.

So with a review like that…you’ll want to make this one!

**Side note: I used the smallest Spaghetti Squashes I have ever seen, and it still had enough squash mixture to make a 8x8 casserole.


Lasagna-Stuffed Spaghetti Squash

Makes 4 very generous servings

5 pounds spaghetti squash (2 medium-sized squash)
1 teaspoon olive oil
1 yellow onion, diced
2 to 3 cloves garlic, minced
1 pound ground turkey
1 1/2 teaspoons salt, divided
1 (15-ounce) can crushed tomatoes
2 cups ricotta, whole or 2%
1/4 cup roughly chopped parsley
16 oz shredded mozzarella, divided
Chopped parsley or basil, to garnish

Preheat the oven to 400°F. Cut the squashes in half and scoop out the seeds. Lay them cut-side down in a roasting pan or other baking dish, and add about an inch of water. Roast for 45 to 60 minutes, until soft when poked with a fork. Transfer to a cooling rack until cool enough to handle. (I did this the day before, chilled, and scraped when they were cool)


While the squash is roasting, warm the olive oil in a high-sided skillet or saucepan over medium-high heat. Stir in the onions and cook until translucent, 5 to 8 minutes. Stir in the garlic and cook until fragrant, 30 seconds. Add the ground beef and 1 teaspoon of salt. Cook until well-browned, breaking up the ground turkey into small crumbles, 5 to 8 minutes. Stir in the crushed tomatoes and bring to a simmer. Continue simmering the sauce until the squashes are ready, 5 to 20 minutes. Taste the sauce and add more salt if desired.


Use a fork to shred the inside of the squash, down to the shell. Mix the shredded squash into the tomato meat sauce. In a separate bowl, mix together the ricotta cheese, mozzarella and the parsley and 1/2 teaspoon of salt.


Wipe out the roasting pan and arrange the squash shells inside, like bowls. Divide half of the ricotta mixture between the shells, using a spoon to spread the ricotta evenly over the bottom of the shells. Divide half the tomato sauce between the shells, spooning over top of the ricotta. Top with another layer of ricotta and tomato sauce.


→ At this point, the shells can be covered and refrigerated for up to 24 hours. Add an extra 10 minutes to the cooking time.

Bake the shells for 15 minutes at 400°F. Sprinkle the mozzarella over the tops of the squashes and bake for another 15 to 20 minutes, until the cheese is bubbly and browned in spots. (For a more golden top, run the squashes under the broiler for a minute or two.)

Sprinkle parsley or basil over the tops and serve immediately. Leftovers will keep for 1 week in the fridge.


Recipe Notes
Casserole Version: Instead of stuffing the squash shells, this can be baked casserole-style in an 2-quart (8x8-inch) baking dish. Layer 1/3 of the tomato sauce into the dish, followed by 1/2 the ricotta and another 1/3 of the sauce. Top with the remaining ricotta and the tomato sauce. Bake for 15 minutes, then sprinkle with mozzarella. Bake another 15 to 20 minutes, until bubbly.  (I made this and froze it until I’m ready to make a quick dinner….truth be told, the neighbors are on vacation, so I used their freezer, and left instructions on how to cook.)

Monday, August 25, 2014

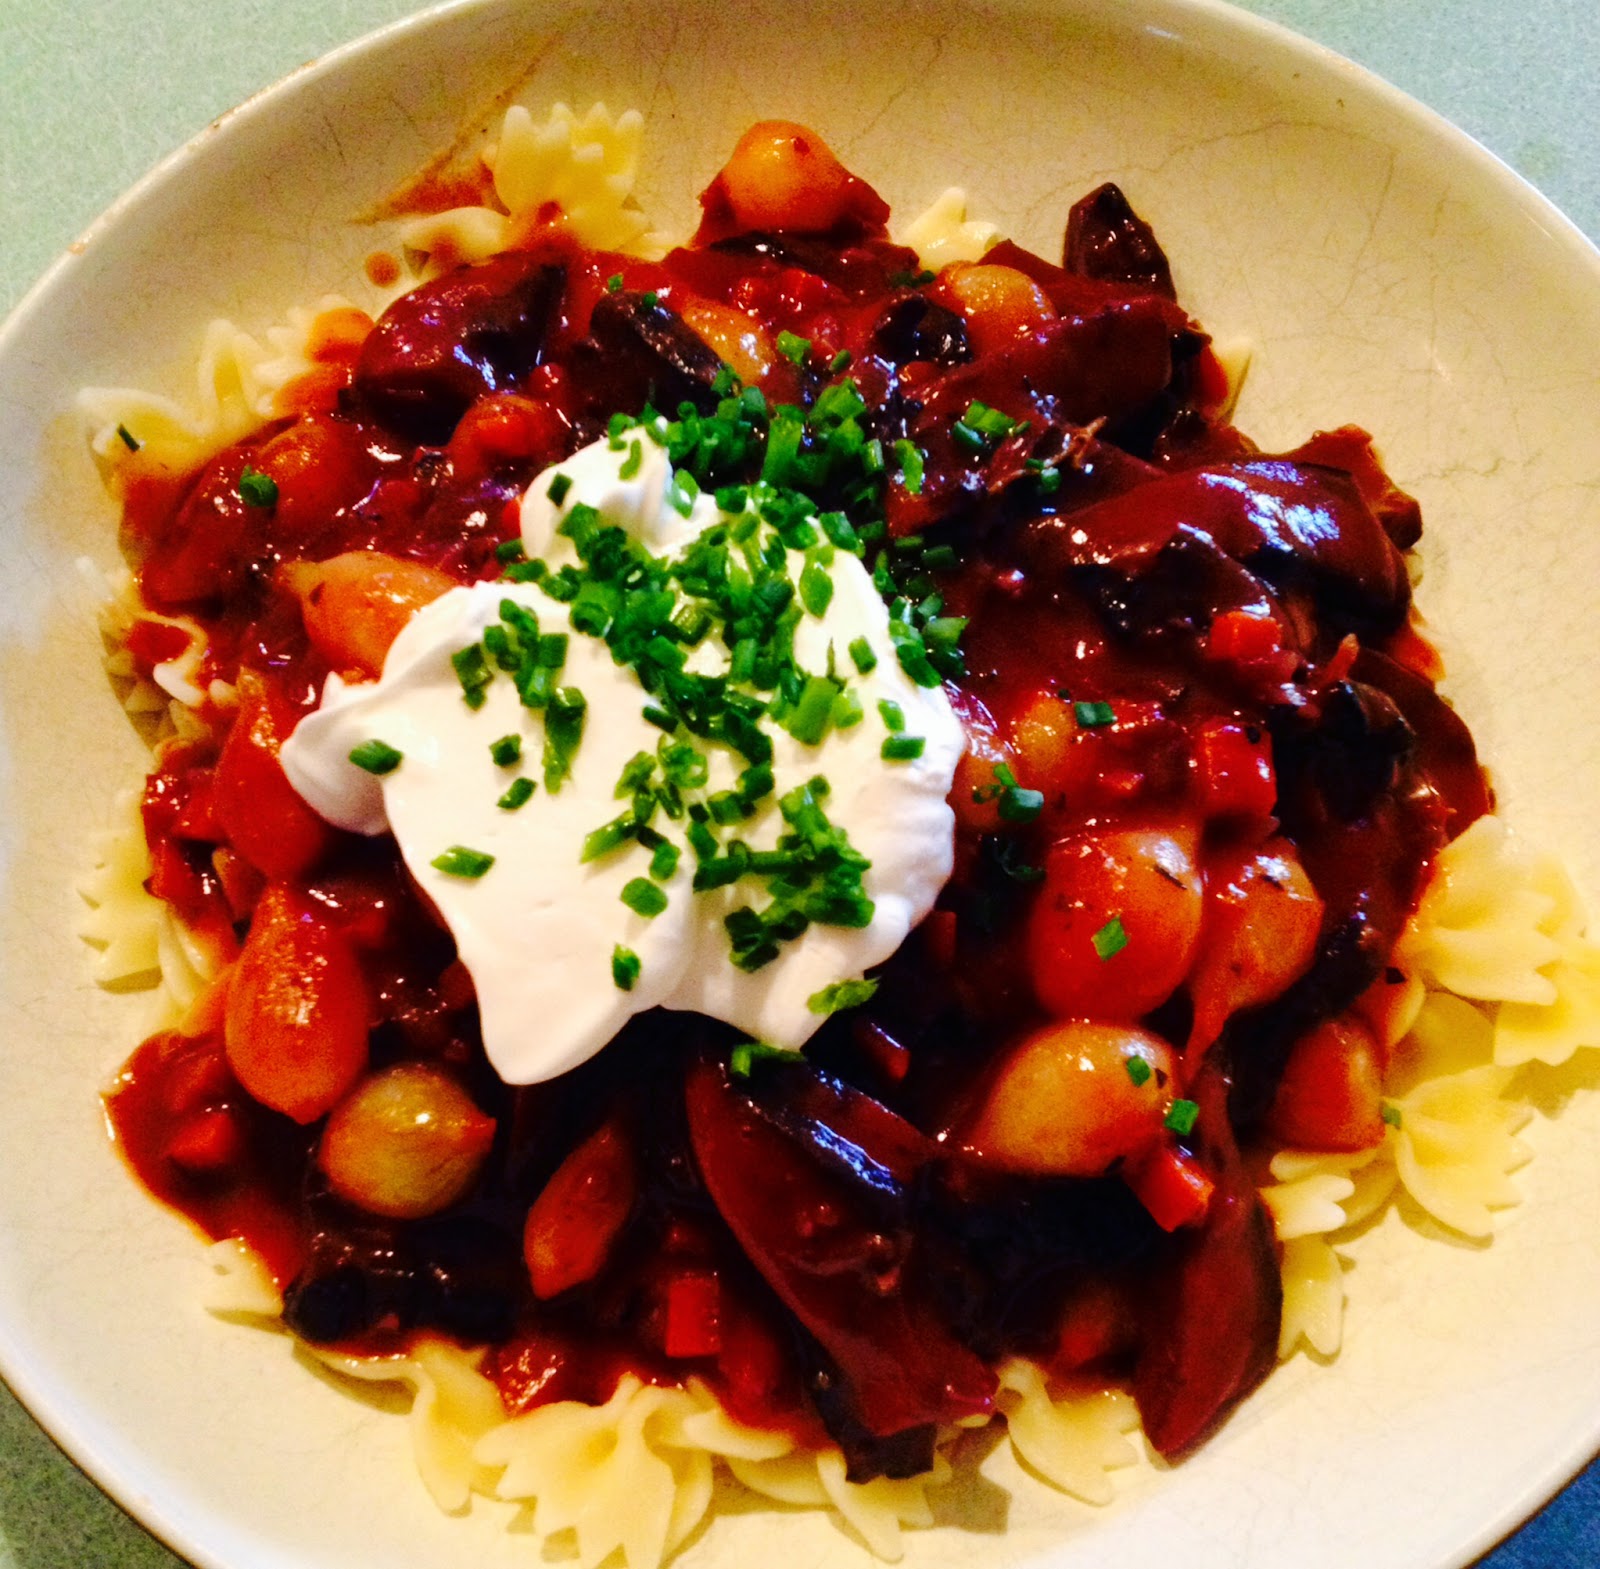
[Boeuf] Mushroom Bourguignon

Boeuf Mushroom Bourguignon

A few months back, I found a recipe I wanted to try, a meatless version of Julia Childs’s Boeuf Bourguignon. Mushroom Bourguignon.  Now I run a risk in my family, and serving circle, because, while my partner (recently made my husband!!), doesn't eat meat (with 4 legs), the other regular at our dinner table regularly chants MEAT! MEAT! MEAT! And myself being a recent convert to liking the delicious fungus, making a French classic with mushrooms if a bit risky, you see…. But I will have to say that it’s taken me about 4 months to muster up courage to make this one…..I’m not sure what I was waiting for?  To me it was like a Mushroom Stroganoff.  Delicious!!!  You will need to not wait to make this…..make it and ENJOY!


Mushroom Bourguignon

Serves 4

2 tablespoons olive oil
2 tablespoons butter, softened
2 pounds 
portobello mushrooms, in 1/4-inch slices (save the stems for another use) (you can use cremini instead, as well)
1/2 carrot, finely diced
1 small yellow onion, finely diced
2 cloves garlic, minced
1 cup full-bodied red wine
2 cups beef or vegetable broth (beef broth is traditional but vegetable to make it vegetarian; it works with either)
2 tablespoons tomato paste
1 teaspoon fresh thyme leaves (1/2 teaspoon dried)
1 1/2 tablespoons all-purpose flour
1 cup pearl onions, peeled (thawed if frozen)
Egg noodles, for serving (I used Bow Tie Pasta)
Sour cream and chopped chives or parsley, for garnish (optional)

Heat the one tablespoon of the olive oil and one tablespoon of butter in a medium Dutch oven or heavy sauce pan over high heat. Sear the mushrooms until they begin to darken, but not yet release any liquid — about three or four minutes. Remove them from pan.
Lower the flame to medium and add the second tablespoon of olive oil. Toss the carrots, onions, thyme, a few good pinches of salt and a several grinds of black pepper into the pan and cook for 10, stirring occasionally, until the onions are lightly browned. Add the garlic and cook for just one more minute.

Add the wine to the pot, scraping any stuck bits off the bottom, then turn the heat all the way up and reduce it by half. Stir in the tomato paste and the broth. Add back the mushrooms with any juices that have collected and once the liquid has boiled, reduce the temperature so it simmers for 20 minutes, or until mushrooms are very tender. Add the pearl onions and simmer for five minutes more.

Combine remaining butter and the flour with a fork until combined; stir it into the stew. Lower the heat and simmer for 10 more minutes. If the sauce is too thin, boil it down to reduce to the right consistency. Season to taste.

To serve, spoon the stew over a bowl of egg noodles, dollop with sour cream (optional) and sprinkle with chives or parsley.


------------------------------------------------------------------------------------------------------------
Mushroom Bourguignon

Serves 4

2 tablespoons olive oil
2 tablespoons butter, softened
2 pounds portobello mushrooms, in 1/4-inch slices (save the stems for another use) (you can use cremini instead, as well)
1/2 carrot, finely diced
1 small yellow onion, finely diced
2 cloves garlic, minced
1 cup full-bodied red wine
2 cups beef or vegetable broth (beef broth is traditional but vegetable to make it vegetarian; it works with either)
2 tablespoons tomato paste
1 teaspoon fresh thyme leaves (1/2 teaspoon dried)
1 1/2 tablespoons all-purpose flour
1 cup pearl onions, peeled (thawed if frozen)
Egg noodles, for serving (I used Bow Tie Pasta)
Sour cream and chopped chives or parsley, for garnish (optional)

Heat the one tablespoon of the olive oil and one tablespoon of butter in a medium Dutch oven or heavy sauce pan over high heat. Sear the mushrooms until they begin to darken, but not yet release any liquid — about three or four minutes. Remove them from pan.

Lower the flame to medium and add the second tablespoon of olive oil. Toss the carrots, onions, thyme, a few good pinches of salt and a several grinds of black pepper into the pan and cook for 10, stirring occasionally, until the onions are lightly browned. Add the garlic and cook for just one more minute.

Add the wine to the pot, scraping any stuck bits off the bottom, then turn the heat all the way up and reduce it by half. Stir in the tomato paste and the broth. Add back the mushrooms with any juices that have collected and once the liquid has boiled, reduce the temperature so it simmers for 20 minutes, or until mushrooms are very tender. Add the pearl onions and simmer for five minutes more.

Combine remaining butter and the flour with a fork until combined; stir it into the stew. Lower the heat and simmer for 10 more minutes. If the sauce is too thin, boil it down to reduce to the right consistency. Season to taste.

To serve, spoon the stew over a bowl of egg noodles, dollop with sour cream (optional) and sprinkle with chives or parsley.

Thursday, August 14, 2014

Spaghetti Pie

Recently, my best friend came to visit me from Arizona.  She helped me with the largest catering I have ever done.  She was such a great help to me, but that goes without saying!  You always support your friends, no matter what.  I would help her with whatever, and she would do the same….and did!

I bring this up, because during her incredible visit, I made a great breakfast.  It was an Italian Frittata.  While Craig and I thought it was good…..Glenda had it (not that I counted) every day for breakfast.  And while she was here, I looked up different ideas for dinner, and while looking for a Strada, I found a recipe for Spaghetti Pie.  It sounded delicious!  And like with most recipes, I put it on the back burner and thought I would make it “someday soon”.

Well, today was the day….I made it….or just my version of it!

Spaghetti Pie


Ingredients
16 oz long (spaghetti) pasta, cooked. (You can use leftovers)
8 oz Pesto
6 eggs
1 tablespoon Olive Oil
1 tablespoon freshly grated pecorino or Parmeggiano (I used Asiago)
1 Chicken breast, cooked and diced

Cooking Directions
Heat oven to 375 degrees.
Beat the eggs in a large bowl.
Toss in the pasta and chicken, coat well with the egg.
Lightly oil a baking dish. (I used a spring form pan)
Pour in the pasta and spread it evenly.
Sprinkle with olive oil and grated cheese.
Bake until some top strands of pasta turn golden about 20 minutes.
Serve immediately or at room temperature.

Thursday, May 1, 2014

Ricotta Pea Pasta

A few weeks back, I came across a wonderful looking dish that really intrigued me.  And after reviewing the recipe, I put in on my menu for last week, and it got bumped to this week due to things coming up….and I wish I wouldn’t have waited.  It was so creamy and delicious.  Not to mention EASY to make.

 
Ricotta and Pea Pasta

Ingredients
1 tablespoon plus 2 tsp. kosher salt
1 pound penne pasta
1 garlic clove
1/3 cup loosely packed flat-leaf parsley
2 ½ cups thawed frozen peas, divided
15 ounces (1 ½ cups) ricotta cheese
1 tablespoon lemon juice
1 teaspoon lemon zest
5 tablespoons extra-virgin olive oil, divided
¾ teaspoon pepper
2 tablespoons toasted pine nuts
½ cup finely shredded parmigiano-reggiano cheese

Preparation

1. Bring a large pot of water with 1 tbsp. salt to a boil. Add pasta and boil until tender, 7 to 9 minutes.

2. Meanwhile, whirl garlic and parsley in a food processor until finely chopped. Add 1 1/2 cups peas, the ricotta, lemon juice and zest, 4 tbsp. oil, remaining 2 tsp. salt, and the pepper. Pulse to a coarse purée.

3. Reserve 1 cup pasta cooking water. Drain pasta and return to pot. Immediately add ricotta-pea purée and remaining 1 cup peas and stir until well mixed. Add a little pasta cooking water, if necessary, to loosen sauce.

4. Divide among 4 bowls. Sprinkle each with pine nuts and parmigiano, and drizzle with remaining 1 tbsp. oil.
 

Sunday, March 2, 2014

Shrimp Scampi Pasta

I'm not sure how many of you are like me, but once I get to thinking about something it overwhelms me.  Luckily for me this blog is an outlet, but sometimes it a curse.  Like this post for Shrimp Scampi Pasta.  When I saw a version of this recipe, I put it on the menu, that though, hum...I wonder what make a shrimp a shrimp, and what makes a shrimp a prawn....I wonder if everyone knows why their lumped in to numbers like 26-30 or 51-60.....so the OCD in my took over and at 3 am, I found myself reading all I could find about Shrimp or is it Prawns?

First off let me start by saying, the rest of the world (Non USA) call them prawns, and it is undetermined when the term shrimp came into use.  But go figure it was the English who are credited with first using the term.  That being some of the information I found, there really is a difference between Shrimp and Prawns.

The names "shrimp" and "prawn" are often used interchangeably. Understandably so. Shrimp and prawns have tons in common. They are both crustaceans, they both have 10 legs, they are both found in salt and fresh water, and they both live near the floor of whatever body of water they inhabit.
Yet, biologically speaking, they are different animals. Things labeled prawns are often larger, but aren't necessarily true prawns. And plenty of shrimp aren't shrimpy in size at all.

Want to get really confused? Some "prawns" - such as spot prawns - are biologically shrimp, and some "shrimp" - notably ridgeback shrimp - are technically prawns. So what is the difference?

Shrimp have branching gills, a side plate that overlays segments in front and behind, and carry their eggs outside of their bodies beneath their tails.

Prawns have lamellar gills, side plates that overlap tile-like from front to back, and carry their eggs inside their bodies near their tails.

In short, while shrimp and prawns are not the same, they are interchangeable in the kitchen. So choose your shrimp or prawns based on how they taste, what size you want, and if they've been caught or raised in an environmentally responsible way.

Shell on or shell off?

If the prawns are shell-on, you'll need to peel them. This can be done before or after cooking, but peeling them after cooking makes for a juicier, more flavorful prawn,  I prefer to peel them, and I like my food user friendly!

Turn the prawn over and pull the shell open along the length of the belly, working from the head end downwards, prying it open so that you can pull the prawn free.  I take the tail off as well, for this recipe.

Once the shell is off, check to see if there is a black line running down the back of the prawn. This is the intestinal tract - if it's black, it's full. It's not harmful to eat, but the prawn looks better without it, and it can be a bit gritty. Removing it is called 'deveining'. Using a small, sharp knife, make a shallow cut along the length of the black line, then lift it out using the tip of the knife.


Shrimp Scampi Pasta


1 pound of Prawns/shrimp (I used 26-30)
1 cube (1/4lb) unsalted butter
2 cloves of garlic, mashed, pressed or minced (however you like!)
Zest of 1/2 of a lemon
Juice of 1 lemon
Red pepper flakes
Salt and Pepper
1 lb Linguini, cooked according to package (or pasta of your choice)

Prep shrimp, peel and devein, set aside.
Boil and drain pasta, set aside
In hot pasta pan, heat butter, lemon zest, juice, red pepper flakes, salt and pepper.  When butter is hot, sauté shrimp until pink, toss in pasta, and stir. Taste and adjust seasonings accordingly.

Serve hot, and garnish with parmesan and a sprinkle of bread crumbs, if you choose.


Thursday, February 27, 2014

Curried Chicken Salad

Quite a few years ago, I worked in the backroom of the Deli in the major retailer I’ve worked for, for the majority of my career.  This job entailed making classic recipes that had been approved to sell in the salad case.  Well, when you make these delicious salads so many times, you tend to just remember the recipe.  Fast forward a few years later, when that same deli streamlined production and made most salads off site, these classic recipes went by the way side, a very sad moment… But wait….fast forward a couple more years, and I was challenged in revamping the salad case…..and besides visiting a bunch of competitors and gathering samples of what looked good, I pulled a few classics out….including,  this version of the one we used to make in that Deli. 

I took this great flavorful salad, and packed it into a pocket bread (or Pita), and wow was it delicious.

Curried Chicken Salad

6 chicken breasts, cooked and chopped (I used ½ of a turkey breast, cooked picked off the bone and chopped)
1 ½ cups mayonnaise
¼ cup Major Grey’s chutney (I used my homemade Pineapple Chutney)
4 tablespoons curry powder
1 cup medium-diced celery (2 large stalks)
Green Onion, chopped (white and green parts)
½ cup currents
Salt and pepper, to taste
1 cup whole roasted, salted cashews
1 package Fresh Pocket or Pita bread

For the dressing, combine the mayonnaise, chutney, curry powder, and 1 ½ teaspoons salt in the bowl of a food processor fitted with the steel blade. Process until smooth.

Combine the chicken with enough dressing to moisten well. Add the celery, scallions, and raisins, and mix well. Refrigerate for a few hours to allow the flavors to blend. Add the cashews and in fresh pita, or pocket bread.


I forgot to snap a picture the night before, so this was lunch version....but you get the picture!

Wednesday, January 15, 2014

Arancini......What? (Risotto Balls)


This recipe is a great use of leftovers.  Sometimes we make risotto, just to have these the next day, or so.  These risotto balls are stuffed with a little cube of cheese just to put them over the top. I used Fontina Fontal, but once again, use whatever cheese you like or have on hand.


Risotto Balls (Arancini)

2 cups risotto, chilled (great use for leftovers!)
2 ounces cheese, cubed 1/2"
2 large eggs, lightly beaten
Salt and pepper
Fresh basil, roughly chopped
1 T Italian seasoning
½-3/4 cup of bread crumbs
½-3/4 cup of grated parmesan (don’t use shredded)
1 ½ cups Panko bread crumbs
Peanut oil, for deep frying


You can use a deep fryer to make these, but I make them on the stove, using a heavy pan and heat about 3" of oil to 350 degrees.

In a medium bowl, beat the eggs, add the salt and pepper, basil and Italian seasoning, mixing well.  Add in the Risotto, depending on how sticky the risotto is how much bread crumbs and parmesan you will need to add.  The eggs will act as a binder, but will also loosen up the mixture, so by adding the crumbs and parm, it will tighten up with mix.


Prepare a baking sheet with waxed paper. Take about 2 heaping tablespoon(or a small cookie scoop, scooping out 2 balls) of risotto and form it into a ball, about 2 inches.  Make a small hole in the ball and insert the block of cheese. Reform the ball so the cheese is covered. Cover and chill for approximately 2 hours.

Remove from the refrigerator.  Balls should be sticky.  If you find they are not, whisk another egg and dredge each ball in the flour then into the egg then into the Panko crumbs.  Otherwise you can just dredge the balls in the Panko.


Drop into the heated oil and fry until brown and heated through, about 4 minutes, turning the balls halfway through frying. Drain on paper towel.


These can also be made ahead and frozen.  Wait until you are ready to fry to coat in Panko.

Tuesday, July 9, 2013

Skinny Chicken Chow Mein

If you’ve been following for a while you’ll know that my family came for a visit a few months ago. When they were here I made a few things that made my sister think of me when she found a few websites, mainly skinnykitchen.com, where I found “Skinny Chow Mein”.  From there, I developed the following recipe.  When I first made it, we only had enough for Craig and my lunch the next day. We both said WOW, this was amazing, and even better the next day.  So I made it again, and this time….even better.

Skinny Chicken Chow Mein 


Ingredients:
16 ounces refrigerated yakisoba
2 cups celery, sliced on the diagonally
2 cups onion, diced
5 cups cabbage, shredded
8 oz Shredded Carrots
5 oz Snow Peas, chopped
1½ cups cooked chicken breast, diced
Cooking spray
2 teaspoons vegetable oil

Ingredients for Sauce:


⅓ cup plus 1 tablespoon reduced-sodium soy sauce  (6 tablespoons)
2 tablespoons brown sugar
2 tablespoons sesame oil
2 tablespoons garlic chili sauce
2 tablespoons water
2 cloves garlic, mined
2 teaspoons ginger (from a jar),
Fresh ground black pepper, to taste

Instructions
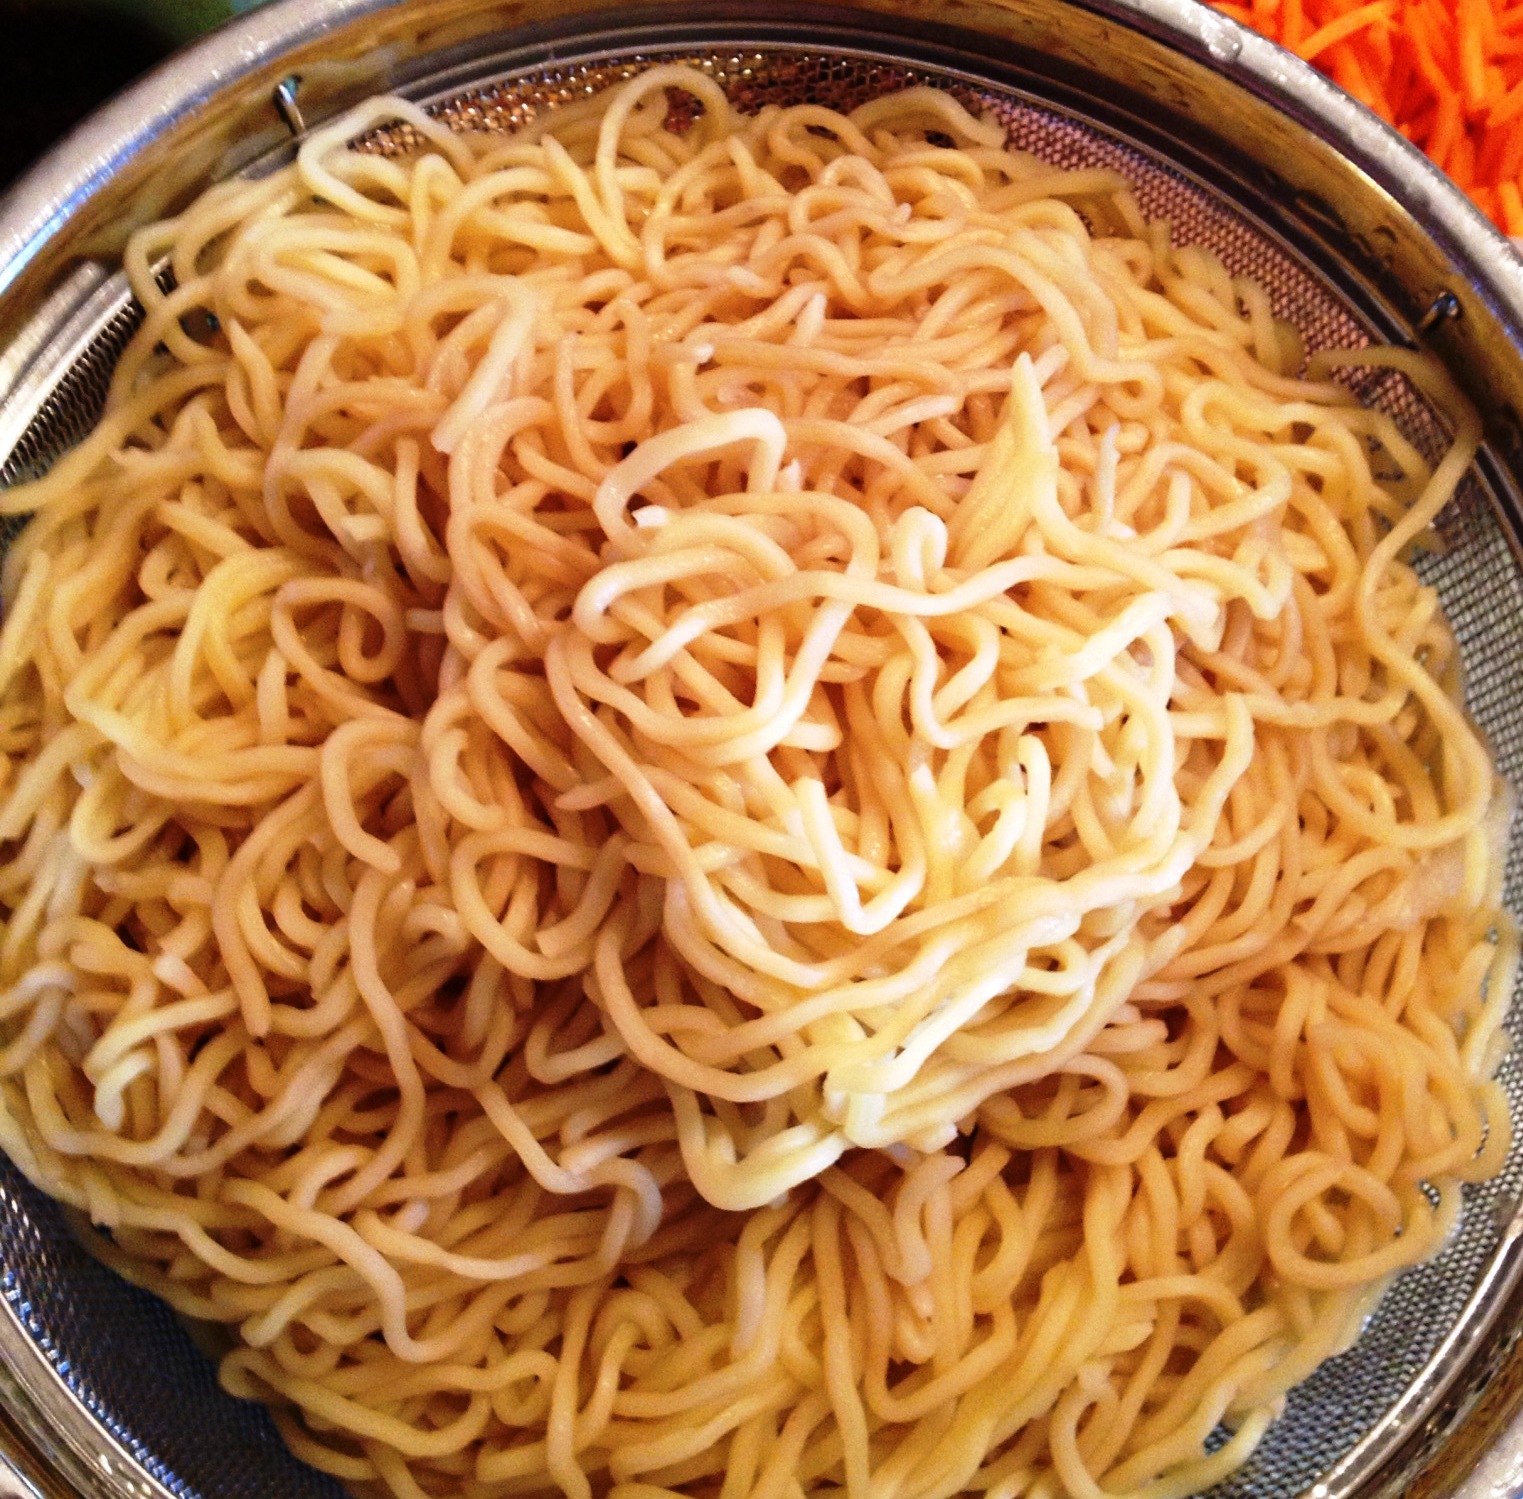
1. Cook the noodles  for about 2-3 minutes just until soft. Do not over cook.
2. In the meantime, prep all vegetables and dice the chicken. Set aside.


3. In a small bowl, add all sauce ingredients and mix until well blended. Set aside.


4. Coat a large nonstick wok or pan with cooking spray. Heat 2 teaspoons of oil in pan.
Add celery and onions and sauté over medium-high heat for several minutes until onions become soft. Add cabbage, carrots and peas and chicken. 

Sauté another few minutes until soft.  Turn down to medium heat, add noodles and soy sauce mixture.  Stir-fry for about 2 minutes or until noodles are heated through. Stir constantly to blend everything.


Store any leftovers in the fridge for a few days.


Makes 5 servings (each serving, 1½ cups)

Thursday, June 13, 2013

Tandoori Chicken & Indian Rice

While I was recently on vacation I was checking out Pinterest, and came across several great recipes, one in particular was Tandoori Chicken.  Now Craig and I have discovered Indian & Persian food a few years back, and we both SO love the flavors, so I knew this would be an easy sell….But I had no idea how easy!  In addition to this I came across a recipe for Indian Rice.  So of late I haven’t been blogging, because, well the recipes I’ve been trying, just haven’t been trying.  I’ve been following them, taking pictures…and alas…reviews are, “don’t make this again!”.  So figuring that this, might or might not work, I decided to not take pictures.  Well that was a mistake. When dinner was served, there was a resounding “Can you put this on the regular rotation”?


Tandoori Chicken Recipe

Ingredients
3 Tbsp vegetable oil
1 teaspoon ground coriander
1 teaspoon ground cumin
1 teaspoon ground turmeric
1 teaspoon cayenne
1 Tbsp garam masala
1 Tbsp sweet (not hot) paprika
1 cup plain yogurt
2 Tbsp lemon juice
4 minced garlic cloves
2 Tbsp minced fresh ginger
1 teaspoon salt
4 whole chicken breasts

Method

1 Heat the oil in a small pan over medium heat, then cook the coriander, cumin, turmeric, cayenne, garam masala and paprika, stirring often, until fragrant (approximately 2-3 minutes). Let cool completely.

2 Whisk in the cooled spice-oil mixture into the yogurt, then mix in the lemon juice, garlic, salt and ginger.

3 Cut deep slashes in 3-4 places on the chicken pieces. Just make 2-3 cuts if you are using separate drumsticks and thighs. Coat the chicken in the marinade, cover and chill for at least an hour (preferably 6 hours), no more than 8 hours.

4 Prepare your grill so that one side is quite hot over direct heat, the other side cooler, not over direct heat. If using charcoal, leave one side of the grill without coals, so you have a hot side and a cooler side. If you are using a gas grill, just turn on one-half of the burners. Use tongs to wipe the grill grates with a paper towel soaked in vegetable oil. Take the chicken out of the marinade and shake off the excess. You want the chicken coated, but not gloppy. Put the chicken pieces on the hot side of the grill and cover. Cook 2-3 minutes before checking.

5 Turn the chicken so it is brown (even a little bit charred) on all sides, then move it to the cool side of the grill. Cover and cook for at least 20 minutes, up to 40 minutes (or longer) depending on the size of the chicken and the temperature of the grill. The chicken is done when its juices run clear, and it 160°-180°F.

Let it rest for at least 5 minutes before serving. It’s also great at room temperature or even cold the next day. 


Indian Style Rice Recipe

Ingredients

2 cups Basmati rice
8 cups water
2 teaspoons salt
2 cloves
2 cardamom pods
One 2-inch piece of cinnamon
3 Tbsp vegetable oil (or ghee if you have it)
1/2 teaspoon dark mustard seeds
1/2 teaspoon cumin seeds
1/4 teaspoon chile flakes
1 medium onion, chopped
3 chopped garlic cloves
1/4 teaspoon turmeric

Method

1 Place rice in a sieve and run cool water through it to rinse it until the water runs clear. Soak the rice in cool water for 30 minutes. Drain.

2 Using a spice basket (large tea ball), place the cloves, cardamom and cinnamon into the basket.  Bring 8 cups of water and the salt to a boil in a large pot, add the spice ball and simmer for 10 minutes. Add the rice and stir. Taste the rice, and test if it is done to your taste; rice can take more or less time to cook depending on how old it is. If still too firm, cook a few minutes longer.

3 When the rice is cooked to your liking, drain the rice into a colander and rinse with cold water to stop if from cooking. Remove the spice ball and discard the contents. Set the rice aside to drain.

4 In a pan large enough to hold the rice, heat the oil over medium-high heat. Add the mustard and cumin seeds and the chile flakes. Cook until the mustard seeds start popping, then add the onion. Sauté until the onion begins to brown, about 5-7 minutes.

5 Add the garlic and sauté another 2-3 minutes. Add the rice and mix well. Sprinkle the turmeric over the rice and mix well. Cook for another 3-4 minutes, stirring often.

Thursday, February 28, 2013

Baked Chicken Stuffed with Pesto and Cheese


I was perusing Pinterest a while back, and found a picture of this recipe.  So, I looked it up and found that is “fits” exactly what I’ve been making lately.  When I was planning the grocery list this week, I noticed that we had everything to make it, so on the menu it went.

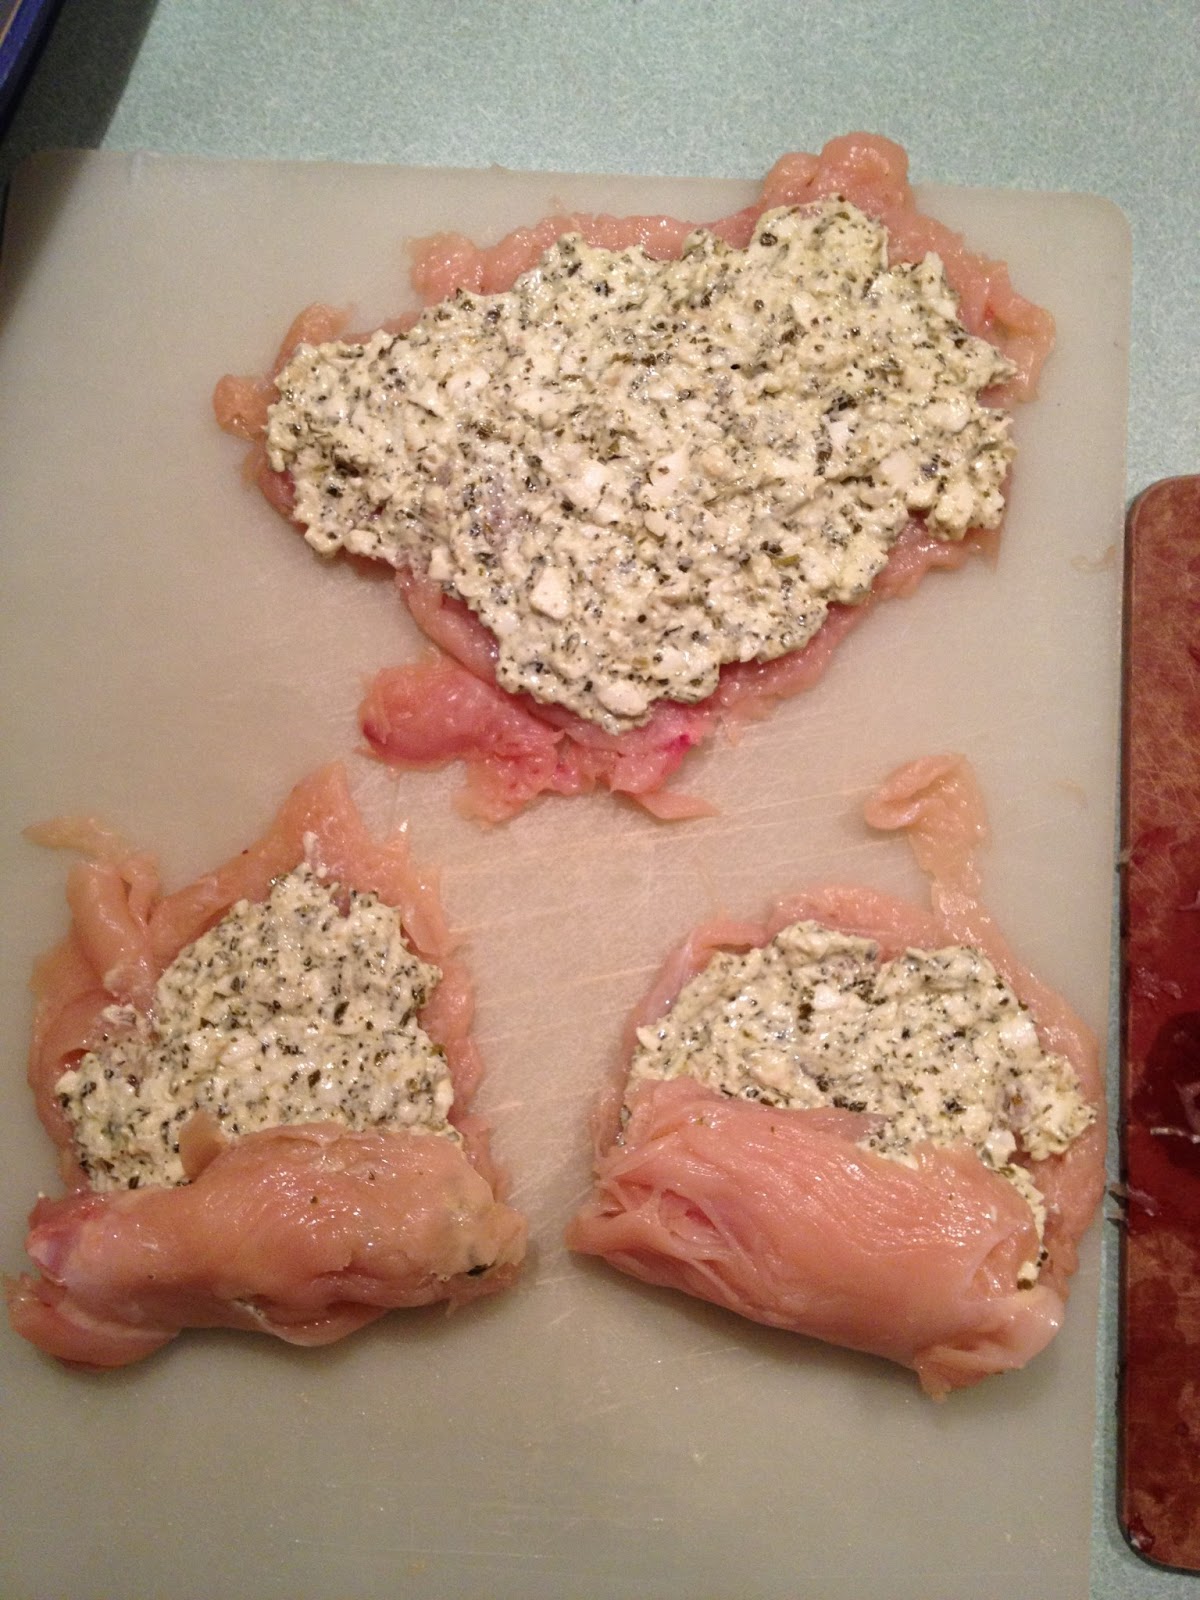
It’s really an easy recipe, the hardest part being pounding the chicken breasts. Notice I made 5 portions, out of 2 large breasts. I chopped up some fresh mozzarella we had in place of the shredded mozzarella.  Please make note that I didn’t measure the almond flour, and went heavy, and still ran out, so plan to go HEAVY!!


Baked Chicken Stuffed with Pesto and Cheese

Ingredients:
2 large boneless, skinless chicken breasts
2 T
(heaping)
your favorite pesto
2 T
(heaping)
sour cream
2 T
(heaping)
grated mozzarella cheese (I used heaping tablespoons of pesto, sour cream and cheese)
2 eggs, beaten (or if they're large eggs one will probably be enough)
3 T
(heaping)
 finely grated Parmesan cheese
3 T almond flour
black pepper to taste

Instructions: Preheat oven to 375F/190C. Spray a small casserole dish with non-stick spray. Trim any visible fat from chicken breasts, then put them one at a time inside a heavy plastic bag and pound with meat mallet until the chicken is as thin as you can get it. Don't worry too much about the shape or whether there are some loose pieces, you can tuck them in when you roll up the chicken.

 
In a small bowl mix together the basil pesto, sour cream, and mozzarella.


Use a rubber scraper to spread a thin layer of this mixture over each chicken breast, stopping about 1/2 inch from the edge of the chicken (so it doesn't run out so much as it cooks.) Roll up the chicken breasts and secure them with a couple of toothpicks. (I roll them so the finished piece is as thin as I can get it so they will cook quickly.)


Prepare two bowls, one with the beaten egg and the other with the grated Parmesan-almond flour mixture, seasoned with black pepper to taste. Dip each chicken breast roll first into the egg mixture and then into the Parmesan-almond flour mixture, patting it on so the chicken breast roll is well-coated with the mixture.


Put chicken breasts into the casserole dish and bake until the chicken is firm and lightly browned. (Start checking after about 25-30 minutes; total baking time will be 40-45 minutes.) Serve hot.