Showing posts with label Appetizers. Show all posts

Sunday, April 11, 2021

Mini Turkey Wellington

A number of years ago I came across a recipe for a recipe for meatloaf wrapped in dough, called Meatloaf Wellington. Now I know this couldn’t be closer to a Wellington, what without puff pastry, pate or prosciutto, but hey, we put pineapple on a pizza and call it Hawaiian? Why not wrap a meatball in dough and call it Wellington. 

I’ve made this recipe for years, and I always comes out great.  Last night I made them and was finally encouraged to write my version down. So here you go…


Wellington Meatballs

Ingredients 

  • 1 cube Butter (for flavor)
  • 1 lb mushrooms, minced
  • 3/4 cup shallots, diced
  • 2 Tablespoons Worcestershire
  • 4 Tablespoons dry sherry
  • Salt and pepper 
  • 3 lbs ground turkey 
  • 4 Tablespoons fresh tarragon, diced (about)
  • 4 Tablespoons fresh thyme, diced (about)
  • 1/4 cup spicy brown mustard
  • 3 eggs + 1 egg for egg wash 
  • 3/4 cup bread crumbs (give or take)
  • 3 tubes Pillsbury thin crust pizza dough, cut into 1 1/2 inch square pieces. 

Directions 

  1. Melt butter. Add shallots and heat until translucent. 
  2. Add mushrooms and continue to sauté until dry.
  3. Add salt, pepper, Worcestershire and sherry. Continue to sauté until reduced by 1/2. Remove from heat. Let cool a little. 
  4. Add turkey, and eggs to a large bowl. Add mushroom and onion mixture. Mix to combine. Add enough bread crumbs to firm up texture. 
  5. Heat oven to 375°. Cut pizza dough. Scoop 1 ounce (or so) on cut dough squares. Fold squares over meat mixture, completely sealing. Set on prepared baking pan. 
  6. Beat 1 egg for egg wash, then brush tops of Wellingtons with egg wash. 
  7. Bake balls for 30 minutes or until golden brown. 
  8. Serve with incredible mustard.


Friday, December 18, 2015

Mexican Cheesecake

Recently we were invited to a Christmas party. The host didn't assign or ask for specific items, so I came up with this savory appetizer. 


Mexican Cheesecake
Makes about 40 appetizer servings

1-1/4 cups crushed tortilla chips/Doritos
2 tablespoons butter, softened
8 ounces ricotta cheese
24 ounces cream cheese, softened
2 eggs
8 ounces shredded cheddar cheese, or so
1 (4-ounce) can chopped green chiles
1 packet taco seasoning, I used homemade taco seasoning.

8 ounces sour cream
8 ounces jalapeno cheddar cheese dip
Chopped tomatoes
Sliced black olives
Chopped green onions

Preheat the oven to 325 degrees.
Combine the chips and butter and press into the bottom of a 9-inch springform pan. Combine the ricotta cheese, cream cheese, eggs (added one at a time), cheddar cheese and green chilies in a food processor until blended. Pour into the springform pan and bake until it sets, about one hour. Remove from the oven.  Let cool. 

Mix together the sour cream and cheese dip, and spread over the cheesecake. Cool at room temperature for one hour. Before serving, sprinkle the top with the tomatoes, black olives and green onions.

Wednesday, May 28, 2014

Pizza Rustica

Sometimes in life you come across a recipe that you enjoy so much, you make over and over again, this ones mine. 

Updated with new pictures!


Years ago I worked at a well-known Italian Restaurant in Portland, well, it was actually a landmark.  Sylvia’s Italian Restaurant has long since closed, after being in business since 1957, Sylvia Passed away in 1992, leaving the restaurant to her daughters, who later sold the property to neighboring restaurant The Rhinelander. 

I joined the Sylvia’s team in 1987, and left in 1989.  During that time, I worked in the Dinner Theatre kitchen and occasionally the main kitchen, and learned a lot about the restaurant industry.  I also learned so much about Italian cooking, and how to pronounce Italian food words, or else Sylvia would have you repeating them, like you were writing lines on a chalkboard.  While I was only employed there a relative short time, there was so much about that job that impacted my life to this day.  Previously I posted a recipe for Rosemary Chicken.  Check it out if you haven’t already.  

For one of the Food Festivals Portland had, that Sylvia’s participated in, we made a quick rustic pizza, Sylvia referred to as Pizza Rustica. 

Now, sometimes I make pizza crust, but usually I take a short cut and use a premade dough.  When I have time, I do Sylvia proud, and make a homemade crust.  You can also use a Focaccia bread as well.

Now let’s talk about cheese…..use what you like, but I HIGHLY recommend a great Asiago.  Parmeggiano Reggiano is the standard of parmesan cheeses, but Asiago has such a brilliant forward flavor, that makes this pizza what it is.  For my pizza I use a Rosemary and Olive Oil rubbed Asiago, from Sartori Creamery.

Pizza Rustica


1 Premade Pizza Crust
2-3 Tomatoes, diced
¾ lb of Asiago, shredded
6 (or so) Garlic, chopped (go heavy on this!!!)
Oregano
Salt and Pepper, to taste
Olive Oil

Preheat the oven to 400°F.

Roll pizza crust on to pizza pan.  Press finger tips into dough to create divots.  Sprinkle the chopped garlic evenly over the crust and drizzle olive oil over crust.  With your hands (Yes, get your hands dirty, they are your best kitchen tool!) rub in the garlic and oil. 
Bake for about 5 minutes, or until the crust in solid, but NOT golden (par-baked). Remove from the oven.
Sprinkle diced tomatoes on top of the par-baked crust.  
Next sprinkle the salt, pepper and oregano.  
Lastly completely cover with the Asiago cheese.

Bake for about 15-20 minutes, until the cheese has melted.

Cut pizza however you choose, we like it in squares, how Sylvia would have cut it herself!

Funny side note, Sylvia's came to one of my cooking classes in high school (which is where I was offered the job she had open!), and during her speech she talked about how she found out what customers wanted, and how she would change to adapt so that customer could get what they were asking for. 
In the late 60's, I think it was, a customer came into her pizza shop and asked her for a Hawaiian Pizza.  Her first though was "what the hell was that?"  She asked the customer what was on a Hawaiian Pizza, and they explained the ingredients and told them that it would be ready shortly.  She ran in back and headed to the local store to get the Canadian bacon and pineapple, all the while thinking how horrible this pizza would be.  She made the pizza and a small one for her and her staff to try, and she admittedly hated it, yet continued to offer it to her customers, whenever they asked for it.
--------------------------------------------------------------------------------------------------------
Pizza Rustica

1 Premade Pizza Crust
2-3 Tomatoes, diced
¾ lb of Asiago, shredded
6 (or so) Garlic, chopped (go heavy on this!!!)
Oregano
Salt and Pepper, to taste
Olive Oil

Preheat the oven to 400°F.
Roll pizza crust on to pizza pan.  Press finger tips into dough to create divots.  Sprinkle the chopped garlic evenly over the crust and drizzle olive oil over crust.  With your hands (Yes, get your hands dirty, they are your best kitchen tool!) rub in the garlic and oil.
Bake for about 5 minutes, or until the crust in solid, but NOT golden (par-baked). Remove from the oven.
Sprinkle diced tomatoes on top of the par-baked crust.  Next sprinkle the salt, pepper and oregano.  Lastly completely cover with the Asiago cheese.
Bake for about 15-20 minutes, until the cheese has melted.

Cut pizza however you choose, we like it in squares, how Sylvia herself cut it!


Friday, June 7, 2013

Smoked Salmon Spread

SMOKED SALMON SPREAD

A week ago, a friend gave me a bag FULL of smoked salmon, and said he has a ton and will have more soon.  Well, I love salmon, so who am I to refuse?  First I used some of it for a Smoked Salmon Caesar Salad, and last night we had company for dinner, so I decided to make some Smoked Salmon Spread. 


Here is my recipe:
 
SMOKED SALMON SPREAD:

8 oz Cream Cheese
1 Tablespoon capers
4-6 oz Smoked Salmon
1 Tablespoon Worcestershire Sauce
1 Teaspoon Dill weed
Salt and pepper to taste (heaver on the pepper than the salt!)

In a food processor, soften the cream cheese, add the Worcestershire sauce, seasonings and capers, blend until smooth.  Add Smoked salmon, and pulse to mix, but not enough to puree the salmon!

Serve with sturdy crackers.

Wednesday, March 13, 2013

Empanadas!!

I love these little treats so much, I decided to make them again, and repost this post below.  Enjoy!
----------------------------------
This past weekend we went to a wine tasting party where the hosts open about 20 bottles of Malbec.  When I received the invite, it stated, we’ll provide the wine, you bring your favorite appetizer.  What better to go with Malbec, than Empanadas.  Below are a few types I have made.  In addition to these recipes I have included some information about how to wrap them and some of the more traditional closures. 


There is no wrong way to make an Empanada.  In many South American countries these are street food, and vary from vendor to vendor.  You can add ANYTHING you want to the filling.  In the past we have had a corn mixture, cheese, as well as Apple and Bananas.


As for the closures, once they are folded you have no idea what’s inside, so the closure/fold is the key to knowing what is inside.


Bob’s take on Traditional Empanada

3lbs of Ground Beef, browned (I use Ground Turkey, and no one can tell the difference!!)
3 T. Olive oil
1 med Sweet Onion, diced
3 T. Cumin Seed, toasted and ground (you can buy store ground, but it’s ground too finely for me)
¼ C Oregano
Salt & Pepper
Cornstarch & Chicken Broth, to thicken
15 large stuffed green olives, diced
6 Hard Boiled Eggs, diced
1 Can (14oz) dices tomatoes

Brown ground meat in olive oil. Mix in cumin, salt and pepper. While this is cooking, dice up the hard boiled eggs and olives. When meat mixture is browned (DO NOT LET DRY OUT!!), mix in eggs, olives and tomatoes(with juice). While this is warming up, mix about ½ cup chicken broth with about 2 T cornstarch (I don’t measure), mix cornstarch mixture into meat mixture, allow to thicken. Cool and refrigerate overnight.

Shredded Chicken and Poblano Empanadas

3 cups chopped, cooked chicken

1 (8-ounce) package (or so) shredded Monterey Jack cheese
2 roasted, peeled, seeded and diced Poblano Peppers
2 Potatoes, cooked and diced

Mexican style salad dressing
1 tablespoon ground cumin
1 ½ teaspoons salt
½ teaspoon pepper

Boil Chicken breasts in seasoned water. When finished, drain and shred cooked chicken. Place in mixing bowl.

Roast Poblano pepper on grill (or oven broiler). When skins are blackened, remove from heat and let cool to the touch. Peel, and de-seed peppers. Dice and place in mixing bowl
Mix together with diced potatoes, seasonings, cheese and dressing. Make sure it’s not too wet, or dry. As too wet will leak out of Empanada, and too dry will crumble when you eat. Refrigerate overnight.

Chorizo, Red Potato Empanadas

1 lb raw Chorizo (bulk, not link)

3 Red Potatoes, cooked and diced
1 ea Green Bell Pepper, diced

1 can Corn, drained
1 med Sweet Onion, diced


Brown Chorizo. When completely cooked, add in corn, red potato, green bell pepper, and onion. Mix thoroughly. Allow to cool and refrigerate overnight.


Now for the Wrappers…..you can always make your own, but why, when these are so incredible.  I prefer the wapper on the right, as it is for a crispy baked.  The one on the left is for flaky (like puff pastry).  Both are for the oven, but there is a third that is for frying.

This is the back, that’s how I tell what is what.  (see the English translation) 


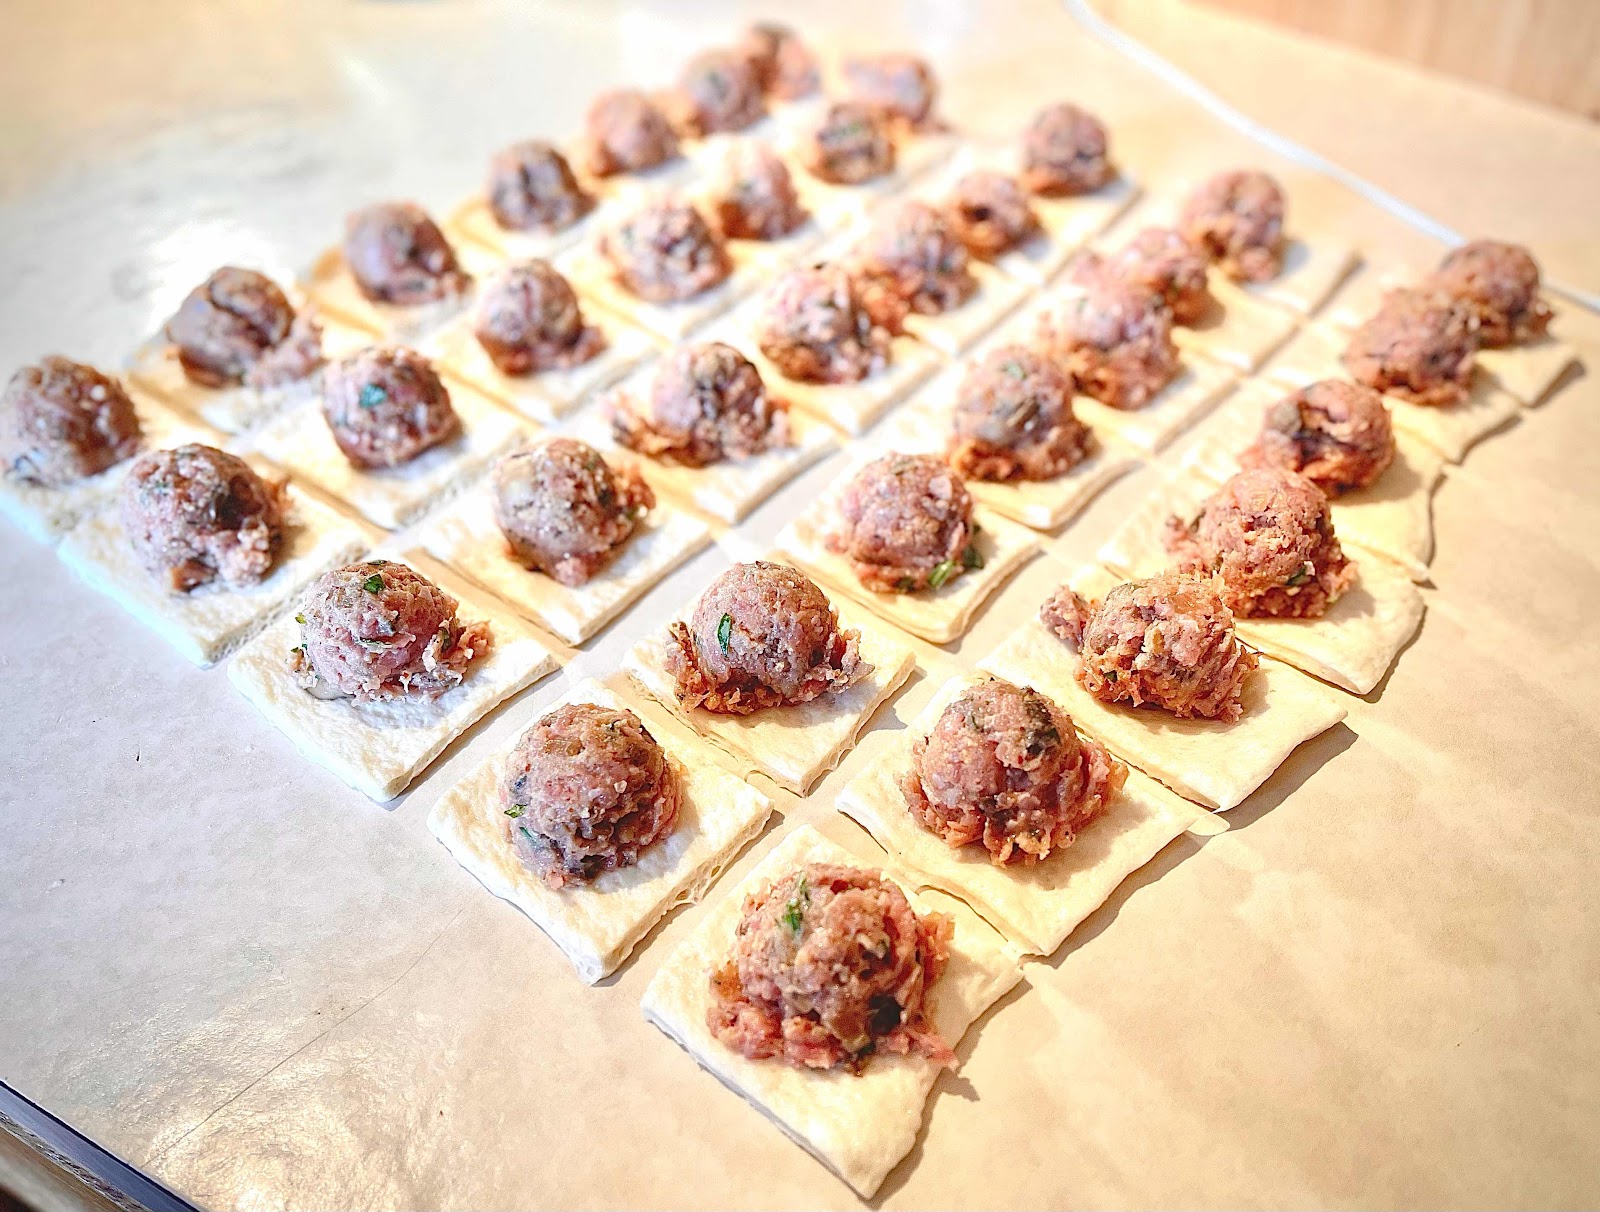
So as for the filling and folding….

Step one, use a scoop to measure out the amount in the center of the wrapper. 


Step two, fold the wrapper in half and press to seal.


Step three, start fold/rolling from the left edge, creating a unique seam.  Keep the seams the same throughout the same filling process.  If this intimidates you, use this hint, fold them the same way, place them on their side or standing straight up.


Step three and a half, When I’m done folding I usually end up with a little tail.  That’s an easy fix, fold the tail under and place the empanada on it.


In this option I use a Tortellini type closure.
 
Here are some examples of the different folds/closures I use.
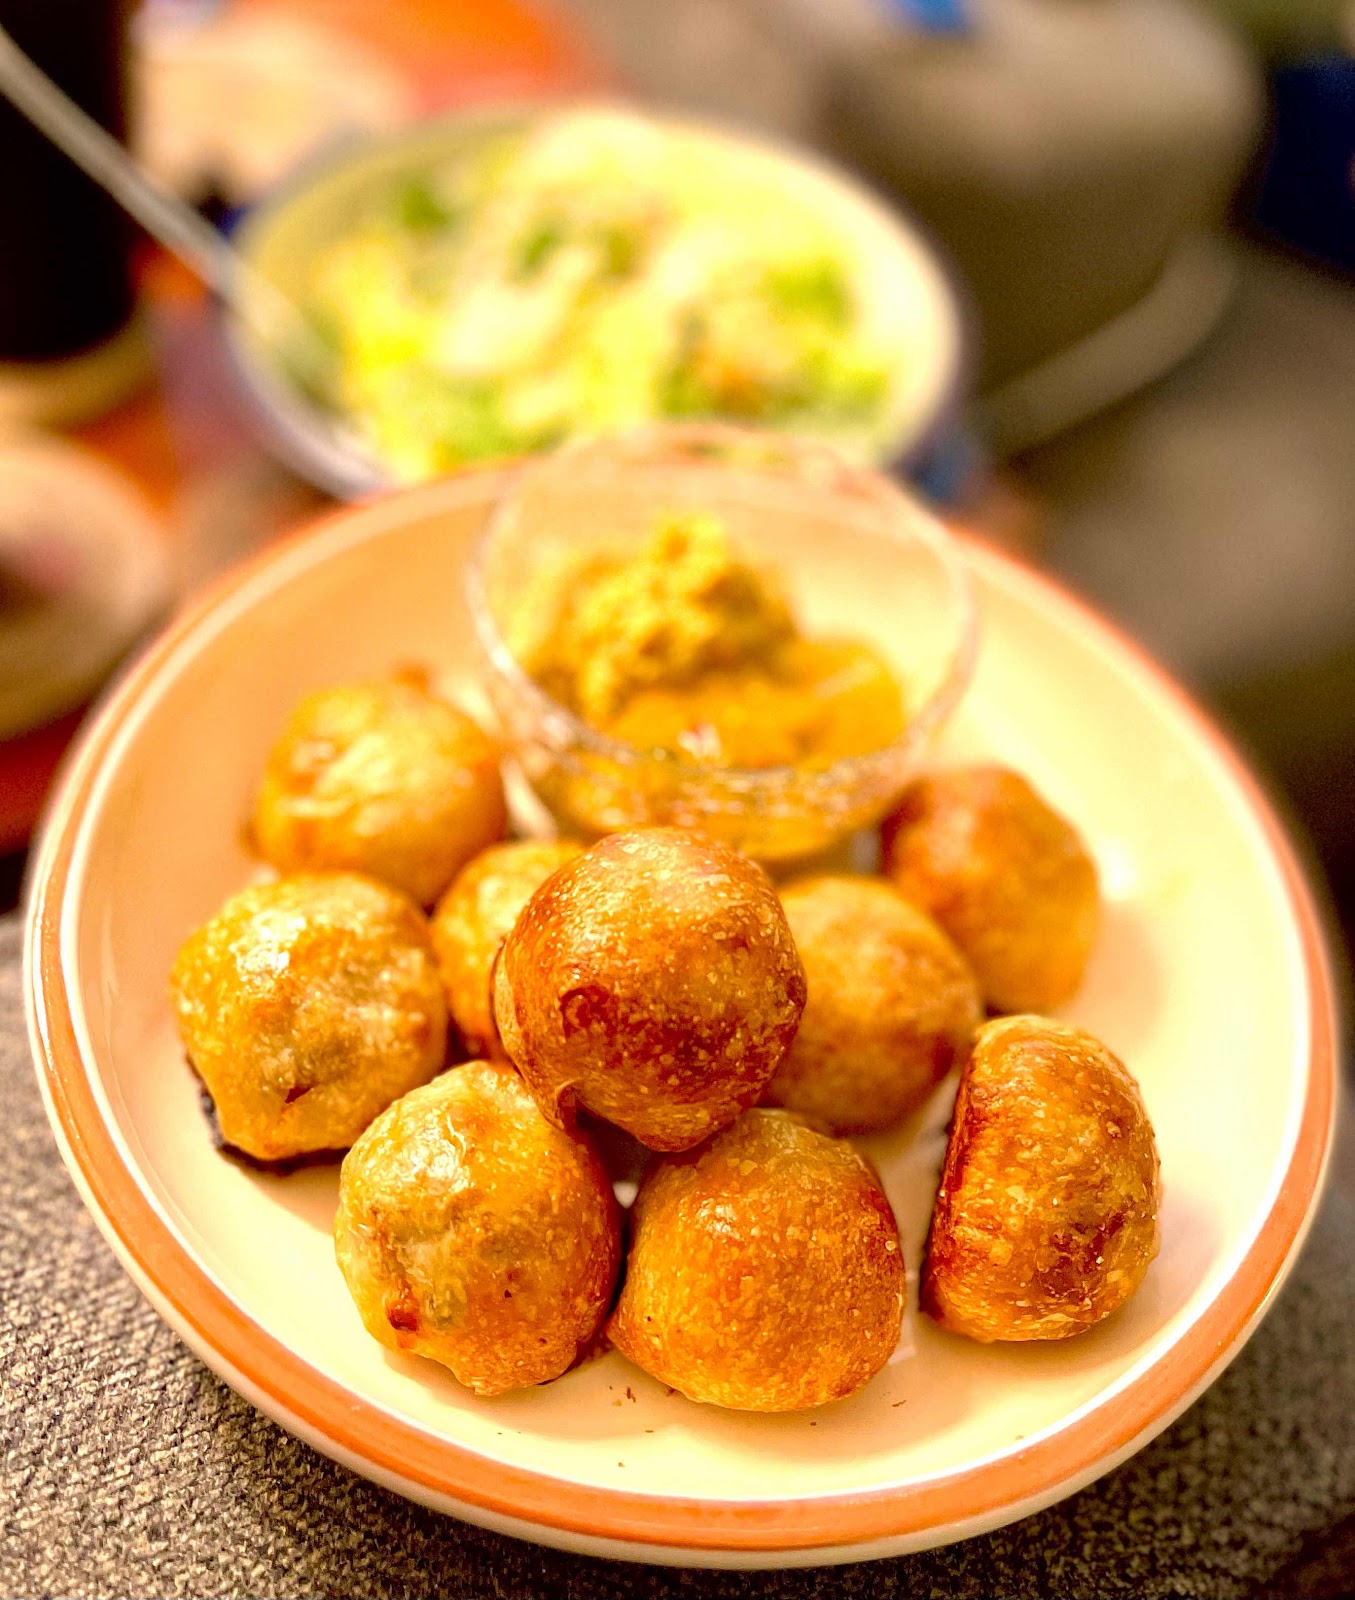
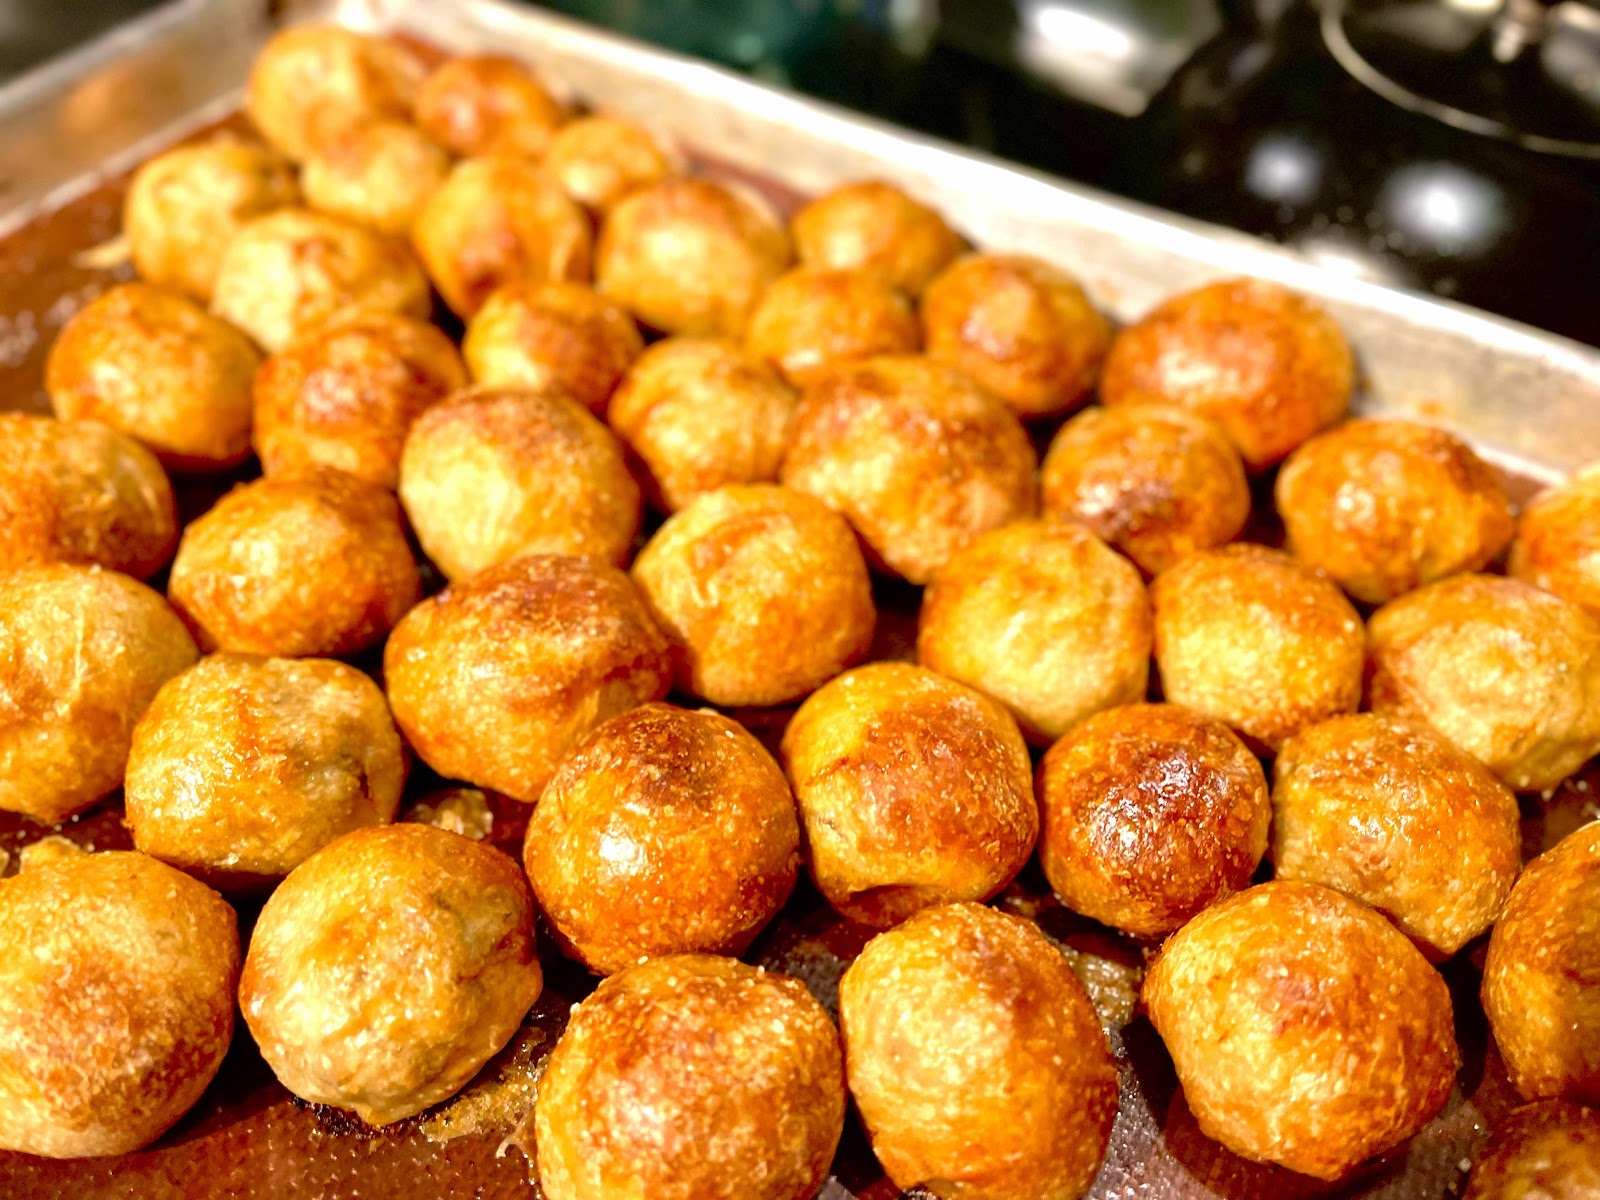
Picture from the most recent creation!